My Rental Kitchen Was an Eyesore — Here’s What Happened
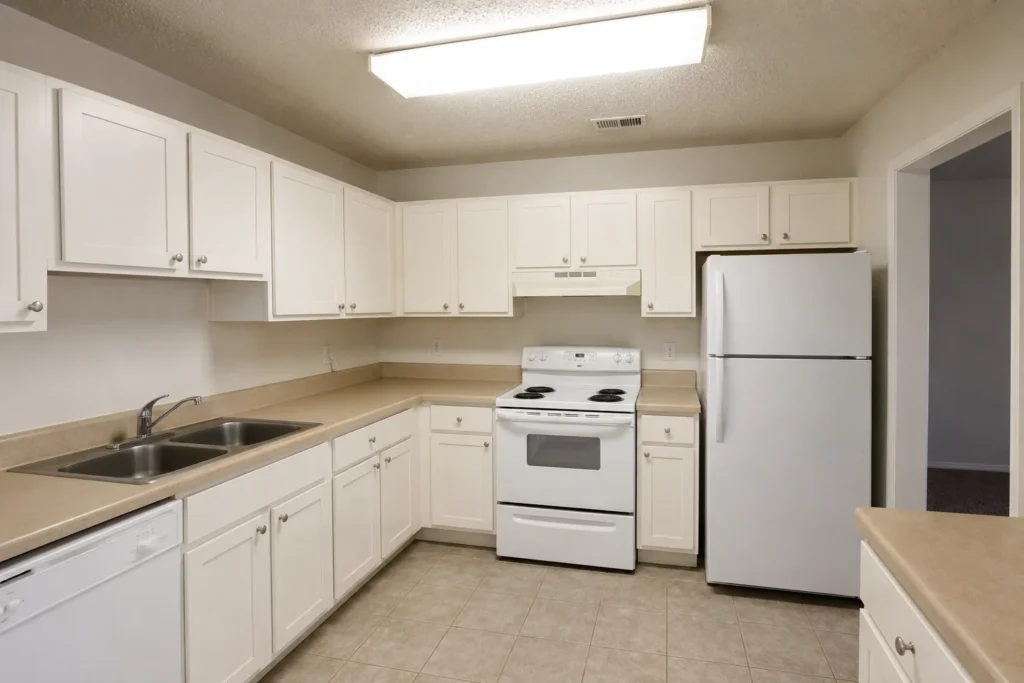
When I moved into my current apartment, the kitchen looked like it hadn’t been touched since 1997. Think: beige laminate countertops with a weird yellow tint, those white builder-grade cabinets with tiny silver knobs, a single buzzing fluorescent tube light, and a floor that was somehow both scratched and slippery at the same time.
I stood in the middle of that kitchen the first evening and genuinely considered eating takeout for the entire length of my lease.
But here’s the thing — I actually love cooking. I couldn’t accept spending two years in a kitchen that made me feel like I was working in a break room at a DMV. So I started researching. I watched hours of YouTube. I fell down a rabbit hole of Pinterest boards titled things like ‘Renter-Friendly Luxury Kitchen.’ I spent a Saturday morning in the organisational aisle at IKEA just staring at floating shelves.
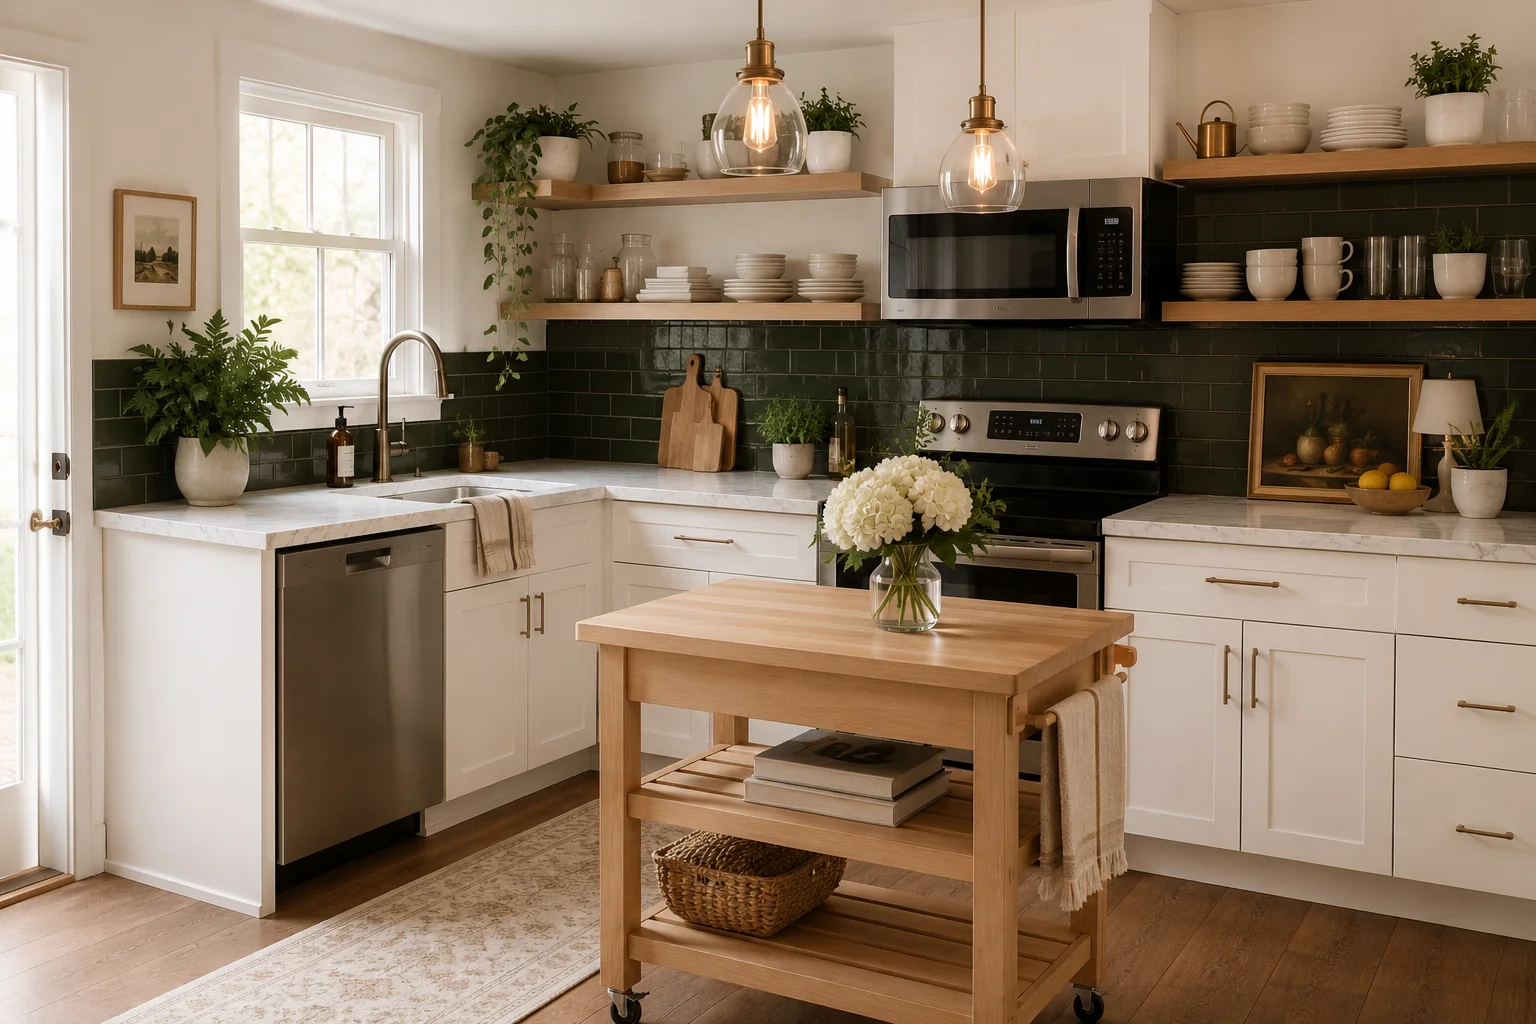
And then I got to work. Over about six weeks — and roughly $340 total — I transformed that sad, beige DMV kitchen into something that makes visitors genuinely ask if I renovated it. People assume I have granite counters. I don’t. People assume I chose expensive pendant lights. They cost $28 each from Amazon.
If you’re trying to figure out how to make a rental kitchen look expensive without touching permanent fixtures, breaking your lease, or blowing your savings, this guide is exactly what you need. I’m going to walk you through every single thing I did, including the mistakes I made along the way.
Why Rental Kitchens Look Cheap — and the Real Fix
Before jumping into what to do, it helps to understand why rental kitchens look the way they do. Landlords aren’t evil — they’re just optimising for durability and mass installation. That means:
- Builder-grade cabinets with basic hardware
- Generic laminate or tile countertops
- Overhead fluorescent or basic flush-mount lighting
- Bare walls with zero personality
- Open countertops crammed with appliances
None of these things individually ruins a kitchen. But together, they create that unmistakable ‘rental’ feeling. The good news is that every single one of these issues can be addressed without a single screw going into a permanent fixture — or at least, nothing you can’t reverse before you move out.
The core secret? You’re not renovating — you’re styling. There’s a massive difference. Let’s get into it.
Trick #1: Lighting Is Everything — And Nobody Talks About It Enough
I cannot overstate this: lighting is the single most impactful change you can make in a rental kitchen. More than the countertops, more than the backsplash, more than anything else. And yet most renters never touch it.
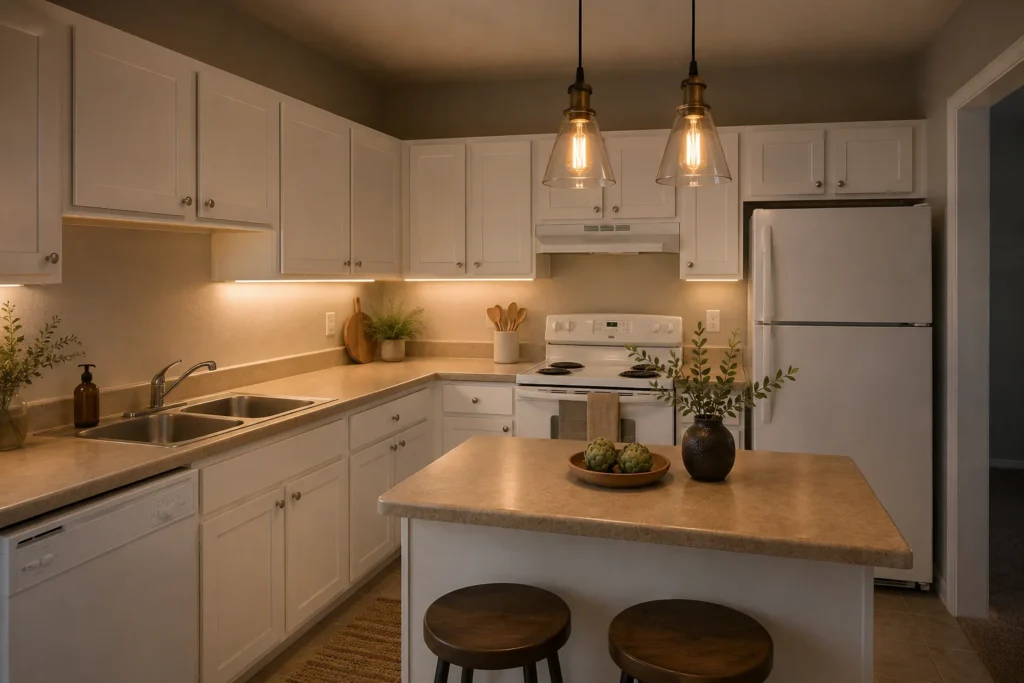
That builder-grade flush-mount ceiling light is killing your kitchen’s vibe. The good news is you can replace it with a plug-in pendant light that doesn’t require any electrical work at all. You just remove the existing light fixture’s bulb, plug the pendant’s cord into a nearby outlet, and use a cord cover to run the wire along the wall or ceiling.
What I used: Two plug-in pendant lights from Amazon (around $28 each), warm Edison bulbs (2700K colour temperature — never go bright white in a kitchen), and a roll of cable raceway from Home Depot for about $12.
I also added under-cabinet LED strip lights. These are game-changing. They’re adhesive, take five minutes to install, plug into a standard outlet, and they make your countertops look like something out of Architectural Digest. Get warm white strips, not cool white — that blue-tinted light is what makes kitchens feel clinical.
Pro tip: Layer your lighting. Aim for three sources — overhead, under-cabinet, and a small accent lamp on the counter if you have space.
Total cost for lighting upgrade: approximately $85. Visual impact: enormous.
Trick #2: Peel-and-Stick Backsplash That Actually Looks Real
This one scared me the most, honestly. I kept reading horror stories about peel-and-stick tiles leaving sticky residue or peeling off mid-lease and taking paint with them. But after testing three different brands, I can tell you the technology has genuinely improved.
The key is buying the right product. Avoid the cheapest options — the ones that come in packs of 10 for $8. They look fake up close, they don’t align well, and the adhesive is either too weak or too aggressive.
What actually works: Smart Tiles, Aspect Peel and Stick, or the Tic Tac Tiles brand. They’re more expensive (around $8-12 per tile), but they look like real ceramic or glass tile. The grout lines are embossed, the texture is realistic, and they can be removed cleanly with a hair dryer.
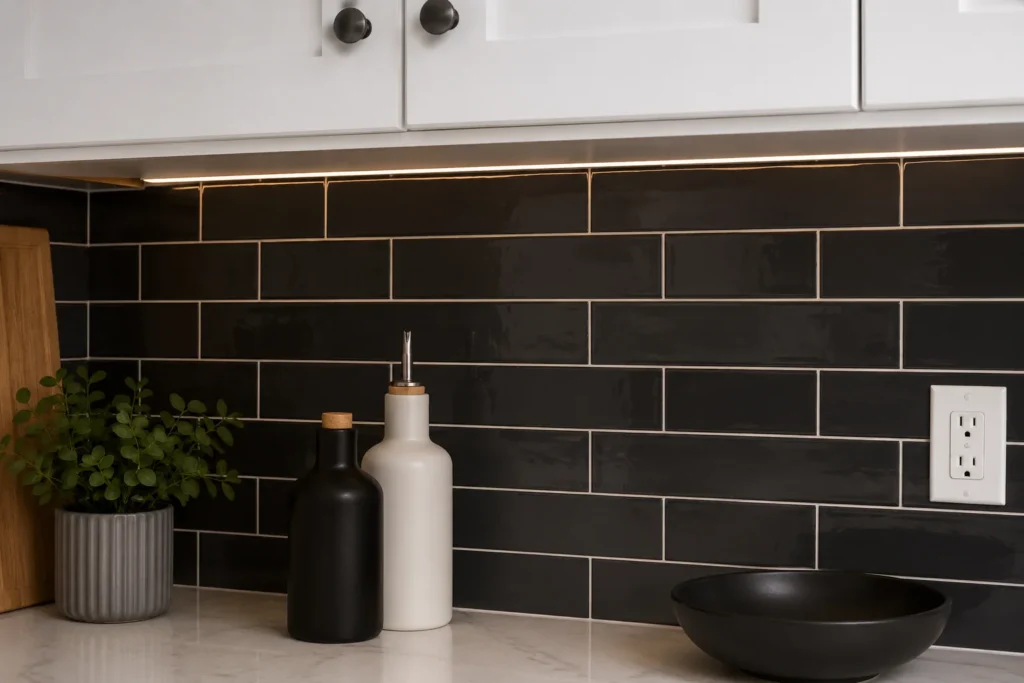
My mistake: I initially bought a white subway tile pattern and installed it. It looked fine but did nothing to make the kitchen feel more elevated — white on white just blended in. When I switched to a dark charcoal herringbone pattern, suddenly the whole kitchen had a focal point.
Colour and pattern matter more than the material itself. A bold, well-chosen backsplash pattern will do more for your kitchen’s perceived value than almost anything else.
- Clean the wall surface with rubbing alcohol and let it dry fully
- Measure and plan your layout — always start from the centre, not the edges
- Peel and press firmly, especially at corners and edges
- Use a credit card to smooth out any air bubbles
- Seal edges with removable caulk (comes off clean with a razor blade)
Trick #3: Floating Shelves for That Designer Kitchen Feel
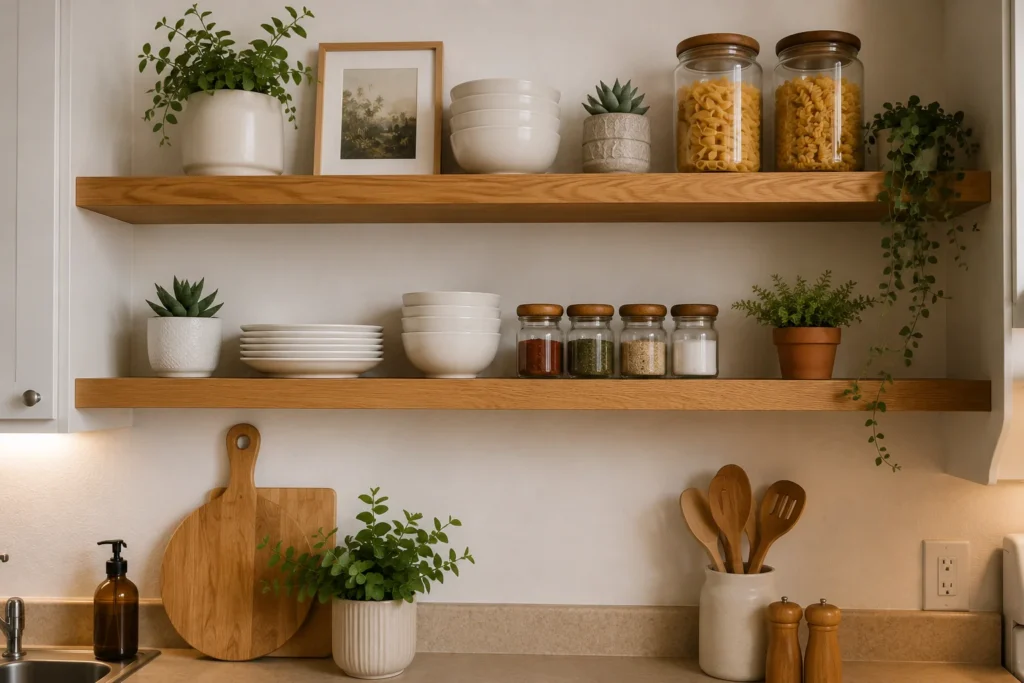
Every high-end kitchen you see in magazines has some version of open shelving. It makes spaces feel intentional rather than functional, curated rather than just stored. And the good news is you can do this in a rental without drilling into walls — or if you can patch small holes, it’s absolutely worth it.
The no-drill route: there are floating shelf systems that use tension rods between walls (great for narrow walls beside windows), adhesive shelf brackets rated for up to 20-25 pounds, or freestanding ladder shelves that lean against the wall and don’t touch it at all.
What I did: I installed two IKEA LACK shelves with standard wall anchors. When I eventually move out, I’ll fill the holes with spackling paste, sand smooth, and touch up with matching paint — it takes about 20 minutes and costs under $5. Most leases allow this, but check yours first.
The shelves themselves cost $14 each. What I put on them made the difference — matching white ceramic bowls, a few mason jars filled with dry pasta and legumes, a small potted herb, and one or two intentional decorative items. Less really is more here.
Rule of thumb: If it doesn’t add visual value or serve a daily purpose, it doesn’t go on the shelf. Clutter on open shelves looks worse than no shelves at all.
Trick #4: Upgrade Your Cabinet Hardware — This Takes 30 Minutes
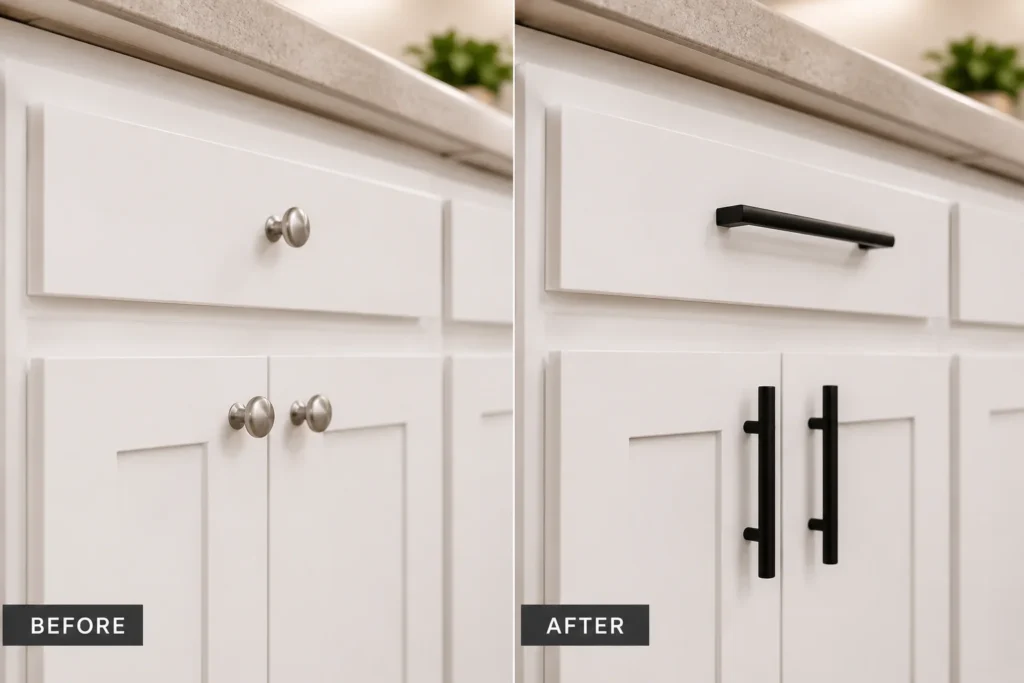
This is the easiest high-impact change you can make, and almost nobody does it. Those standard silver cabinet knobs that come standard in rental kitchens? They scream ‘I bought these in a bag of 50 at a hardware store,’ because the landlord literally did exactly that.
Replacing them is simple: unscrew the old ones, screw in the new ones. Done. You keep the old hardware in a zip-lock bag and reinstall it before you move out. The whole process takes about 30-45 minutes with a regular screwdriver.
The transformation is disproportionate to the effort. I swapped out 14 knobs and 6 drawer pulls for matte black bar handles. Cost: about $68 total. The kitchen went from looking like a 2002 contractor special to something you’d see in a design magazine.
| 💡 Hardware Style Guide Matte black: Works with white, gray, or navy cabinets. Very on-trend, modern. Brushed gold/brass: Looks incredible with white cabinets and warm wood tones. Slightly more traditional. Brushed nickel: Safe, classic, works with almost everything. Bronze: Great for darker cabinetry or a warmer aesthetic. Important: Measure your existing holes before buying. Most standard hardware is on 3-inch (76mm) centres for handles. Knobs are single-hole and universal. |
Don’t overthink the style — just pick one finish and stick with it everywhere. Consistency is what makes hardware look intentional and expensive.
Trick #5: Countertop Contact Paper That Actually Fools People
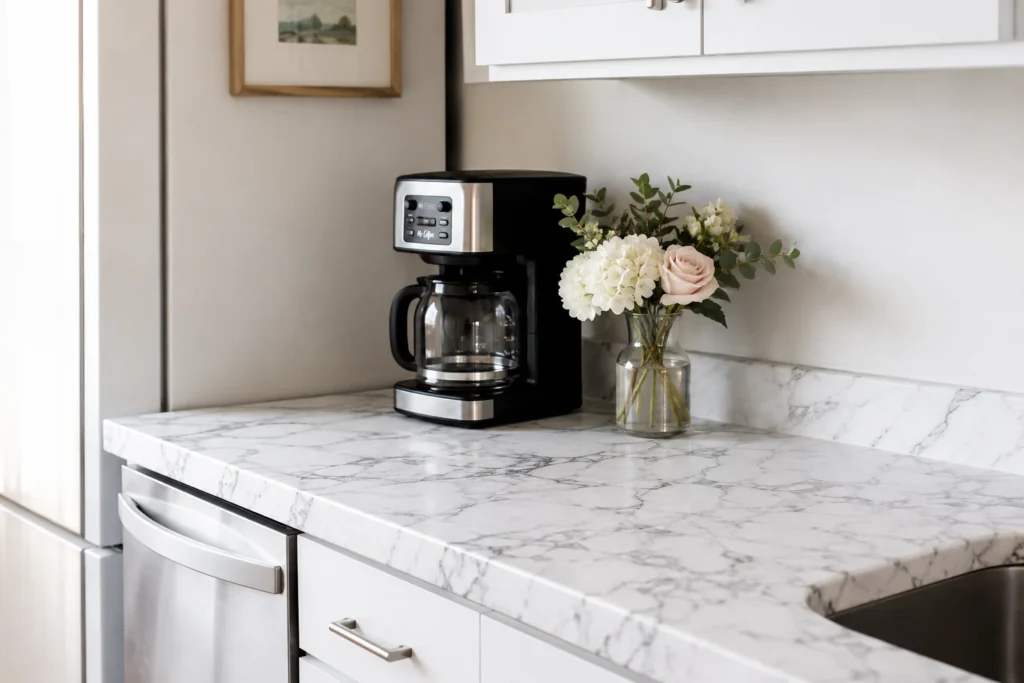
I’ll be honest with you: I was deeply sceptical about this one. Contact paper on countertops sounded like a craft project that would look terrible up close and peel off in a week. I put it off for months.
Then a friend showed me her kitchen — she’d done the Calacatta marble look from a brand called d-c-fix. I genuinely could not tell it apart from real marble until I pressed on it and felt the vinyl give slightly. From normal cooking distance? Absolutely convincing.
What works and what doesn’t: Marble patterns are forgiving because the veining hides seams. Solid colours or wood grain patterns show seams much more obviously. For a first-timer, go marble.
Application is the tricky part. The biggest mistake is rushing it. Here’s how to do it properly:
- Clean your countertop with rubbing alcohol and let it dry completely
- Measure and cut your contact paper with 2 inches of extra on each side
- Peel back about 3 inches of the backing and align your starting edge
- Use a squeegee or credit card to press forward in sections, eliminating bubbles as you go
- Use a hair dryer on low heat to help conform the paper around edges and corners
- Trim edges with a sharp utility knife and a metal ruler
- Press edges firmly — adding a thin bead of removable caulk along the backsplash joint seals it against water
Important: Use a cutting board religiously. Contact paper is not as heat or scratch resistant as real stone or laminate. Protect it and it’ll last 1-2 years easily.
Trick #6: Curtains, Rugs, and Textiles That Pull Everything Together
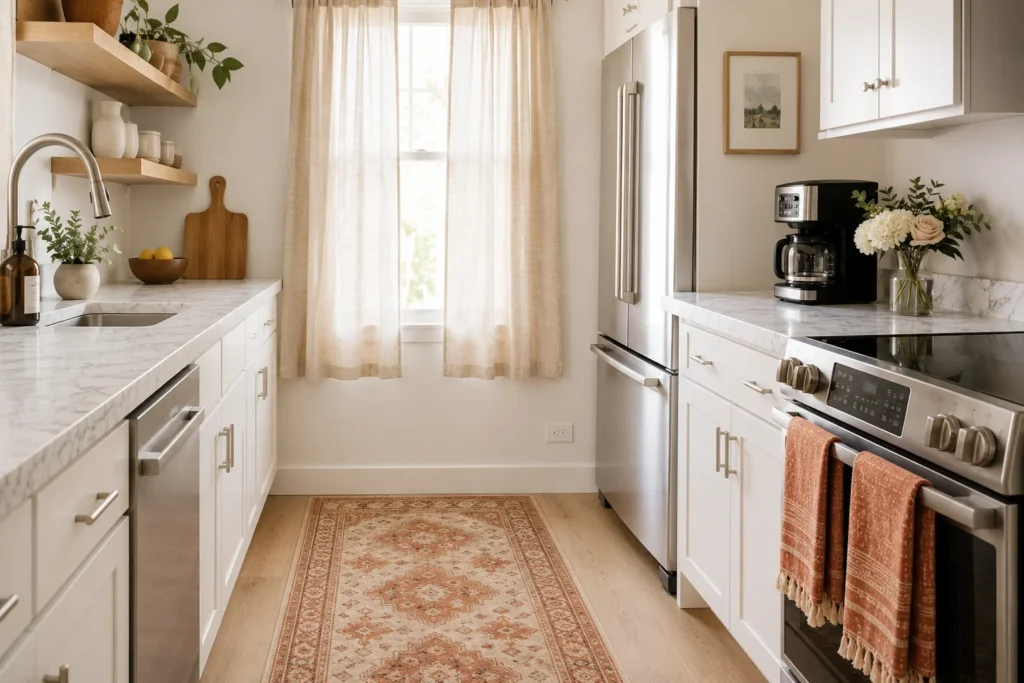
Once your lighting, backsplash, and hardware are done, soft furnishings are what elevate a kitchen from ‘renovated’ to ‘designed.’ Most people put zero thought into this, which is exactly why it’s such a quick win.
For windows, linen-look curtain panels instantly add warmth and texture. Avoid sheer white panels — they look like something you’d find in a dentist’s waiting room. Go for natural tones: cream, sage, warm beige, or even a deep navy if your kitchen handles it. Hang the rod as high as possible, close to the ceiling, and let the curtains fall to the floor. This makes ceilings feel higher and windows feel bigger.
For the floor, a washable kitchen runner rug does two things: it hides the rental floor and adds a layer of visual warmth. I went with a terracotta and cream geometric pattern from Amazon (around $45 for a 2’x6′ runner). It completely changed the feel of the floor space.
The small stuff matters too: Matching hand towels and oven mitts, a small plant or fresh herb pot on the windowsill, a ceramic soap dispenser instead of a plastic pump bottle. These micro-details are what make a kitchen feel like someone with taste lives there.
Trick #7: Countertop Styling — The Art of Curated Minimalism
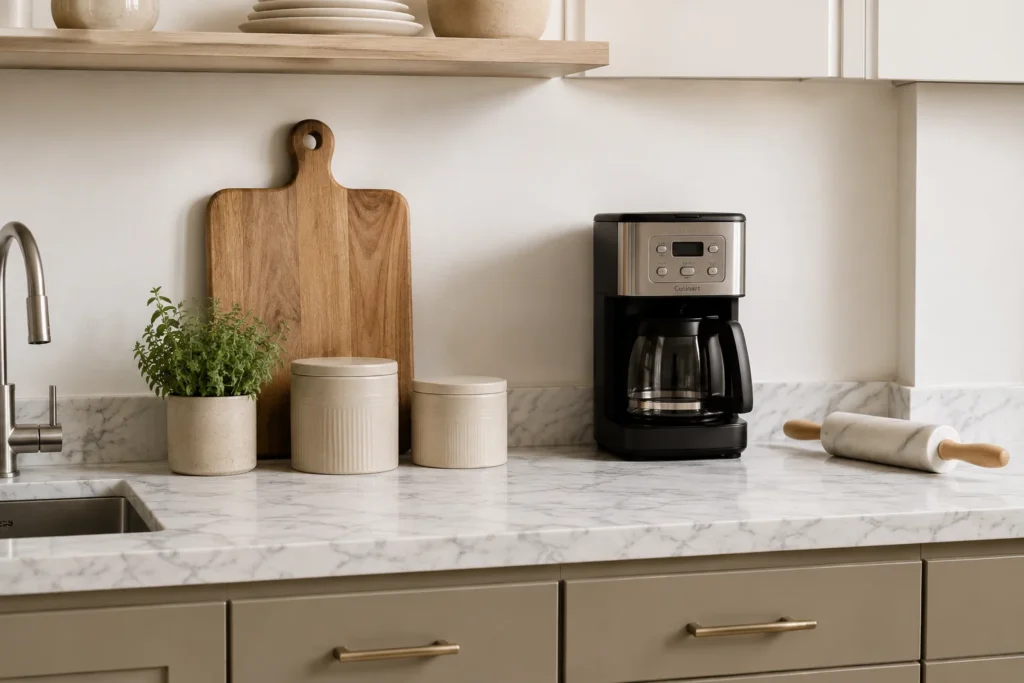
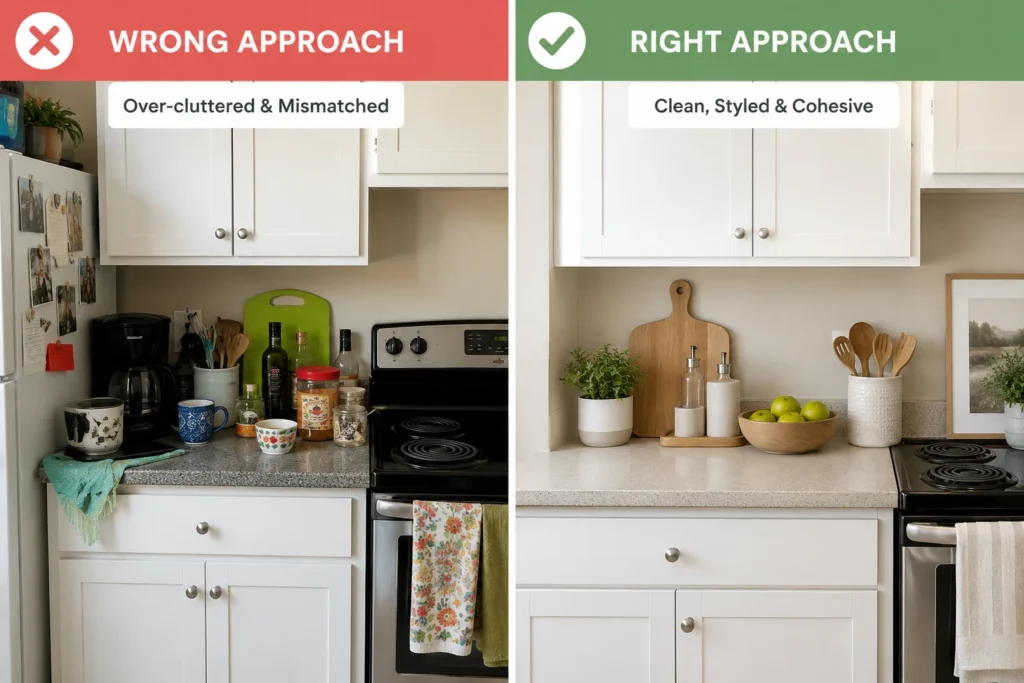
Here’s something I learned the hard way: you can do every other trick perfectly and still have a kitchen that looks chaotic and cheap if your countertops are cluttered.
The expensive kitchens you see in design magazines almost always have clean countertops with very few items on display — and the items that are there are intentional. A beautiful wooden cutting board. A single ceramic canister set. A small plant. That’s it.
In reality, kitchens need to function. You need your coffee maker, your toaster, your paper towels. The trick is to organise these things intentionally and to upgrade the items you do keep out.
- Replace plastic or mismatched containers with matching ceramic or glass canisters
- Get a wooden or marble serving board to lean against the backsplash — it’s decorative and functional
- Store the toaster in a cabinet if you use it less than daily
- Use a small tray to group items together — a ‘coffee station’ tray makes three appliances look like one intentional vignette
- Fresh herbs in a small pot are the cheapest luxury item you can add to any kitchen
The goal is to make it look like someone made choices about what’s on the counter, rather than just setting things down wherever there was space.
Common Mistakes to Avoid (I Made All of These)
Mistake #1: Choosing cool-white lighting
Cool white (5000-6500K) light makes everything look clinical and cheap. Always use warm white bulbs (2700-3000K) in a kitchen. This one mistake undoes everything else.
Mistake #2: Buying contact paper without doing a test strip
Always test your contact paper on a small, hidden section of countertop first. Some older laminate or painted surfaces don’t react well. Find out before you’ve applied it to the whole counter.
Mistake #3: Mixing metal finishes
Gold hardware and silver sink fixtures and chrome faucet = chaotic. Pick one dominant metal finish and let it carry the room. Small variations are fine, but keep your hardware, light fixtures, and faucet in the same family.
Mistake #4: Over-doing the open shelves
More than two floating shelves in a small rental kitchen can make it feel cramped. One well-styled shelf is better than three messy ones.
Mistake #5: Ignoring the ceiling
A basic pendant light or even a string of warm Edison bulbs can transform a ceiling. If you have an ugly light fixture, you can swap it out temporarily (keep the original in a box) — just make sure to reconnect it before moving out and never do anything involving the actual wiring.
Quick-Reference Budget Breakdown
| Upgrade | What I Used | Approximate Cost | Impact |
| Lighting Upgrade | Plug-in pendants + LED strips | $85 | ⭐⭐⭐⭐⭐ |
| Peel-and-Stick Backsplash | Smart Tiles / Tic Tac Tiles | $65 | ⭐⭐⭐⭐⭐ |
| Floating Shelves | IKEA LACK (x2) | $28 | ⭐⭐⭐⭐ |
| Cabinet Hardware | Matte black bar handles | $68 | ⭐⭐⭐⭐⭐ |
| Countertop Contact Paper | d-c-fix marble vinyl | $35 | ⭐⭐⭐⭐ |
| Textiles (rug + curtains) | Amazon runner + linen curtains | $85 | ⭐⭐⭐⭐ |
| Countertop Styling | Canisters, cutting board, herbs | $45 | ⭐⭐⭐ |
| TOTAL | — | ~$411 | Huge |
Final Thoughts — Your Rental Kitchen Can Actually Be Beautiful
If there’s one thing I want you to take from all of this, it’s that knowing how to make a rental kitchen look expensive is really about understanding where visual impact comes from. It’s not about spending a lot of money. It’s about making smart, strategic choices in the right order.
Start with lighting — it changes everything and costs very little. Then tackle the big visual surfaces: backsplash, countertops, hardware. Then layer in the textiles and styling details that make it feel like a home rather than a temporary space.
Your landlord won’t care. Your security deposit will be safe. And you’ll actually enjoy spending time in your kitchen — which, if you cook, is kind of the whole point.
I spent about two years in that apartment and genuinely loved that kitchen by the time I left. It took six weekends and a few hundred dollars. And every single thing I did came out cleanly when I moved out — no charges, no drama, full deposit returned.
You’ve got this. Start with one change this weekend. Swap out that terrible light bulb first. You’ll see what I mean immediately.
You May Also Like These Posts
→ Summer Home Décor Ideas 2026