Introduction – Why DIY Macrame Wall Hangings Are Taking Over Every Home
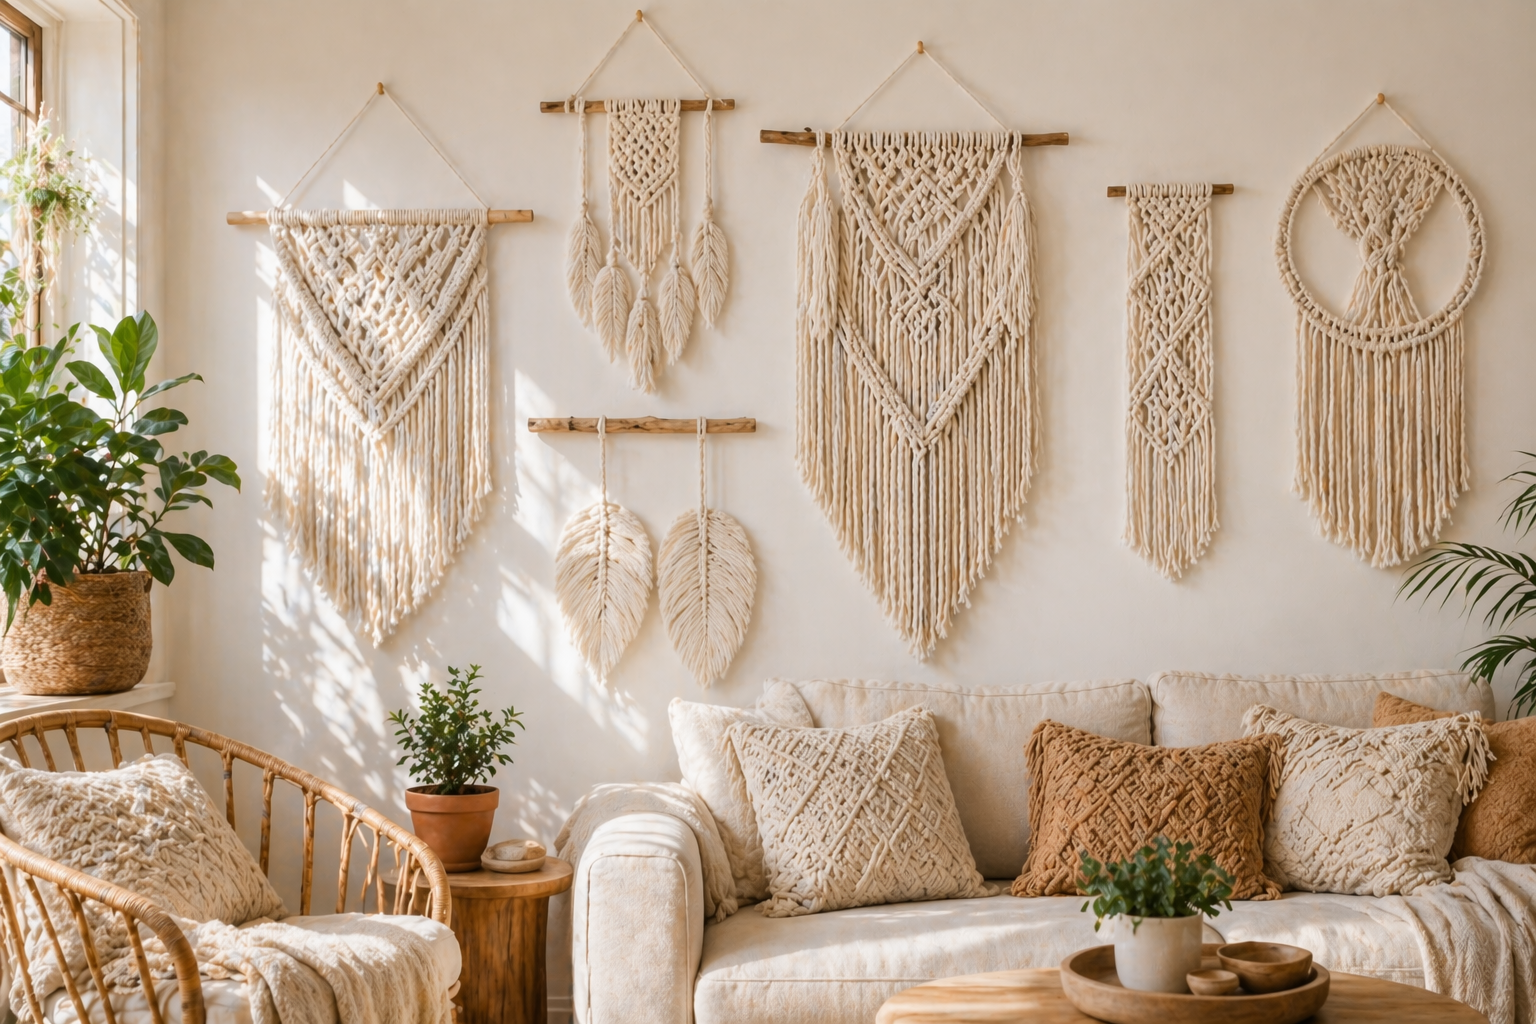
If you have ever walked into a trendy boutique, scrolled through Pinterest for five minutes, or watched a home makeover show, you have almost certainly encountered the irresistible charm of DIY macrame wall hangings. These intricate-looking fiber art pieces are absolutely everywhere — and for very good reason. They add warmth, texture, and an unmistakable bohemian personality to any room that a flat canvas print simply cannot replicate.
Here is the best-kept secret in the crafting world: DIY macrame wall hangings are mostly just tying the same knots over and over again. If you can tie your shoelaces, you already have the fundamental skill needed to create a stunning piece of fiber art. You do not need a fancy art studio, an expensive workshop, or a degree in textile design. All you need is a spool of cotton cord, a wooden dowel or a stick from your backyard, and a healthy dose of patience.
In this pillar guide, we are walking through 10 brilliant DIY macrame wall hanging ideas specifically chosen for beginners. Each project builds on basic knotting techniques and is designed to give you maximum impact with minimum frustration. Whether you want a small accent piece for a bathroom wall or a massive statement hanging above your sofa, you will find the perfect project right here.
Quick Fact
The word ‘macrame’ is believed to derive from the Arabic word ‘migramah,’ meaning fringe. The craft became hugely popular in 13th-century Arab weaving and has been experiencing a major modern revival since 2015.
What You Need Before You Start DIY Macrame Wall Hangings
Before we jump into the individual DIY macrame wall hanging projects, let us cover the essential supplies you will need across most or all of the designs in this guide.
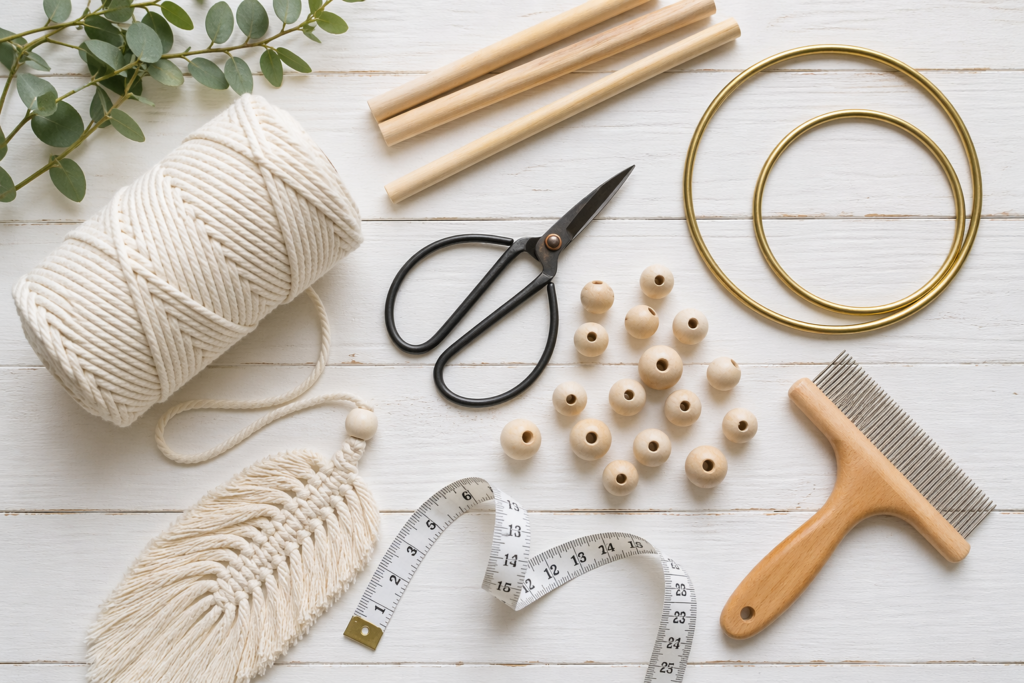
Essential Materials
- Cotton Macrame Cord (3mm, 4mm, or 5mm — twisted or braided)
- Wooden Dowel or Natural Branch (10–24 inches wide depending on project)
- Sharp Fabric Scissors or a Rotary Cutter
- A Measuring Tape
- A Comb or Pet Slicker Brush (for fringing)
- S-Hooks or a Garment Rack (to hang your work while knotting)
- Wooden Beads with Large Holes (optional, for embellishment)
- Metal Hoops in Brass or Gold Tone (for geometric designs)
- Fabric Dye or Natural Dye (for color projects)
- Extra-Hold Hairspray or Fabric Stiffener (for feather projects)
A quick note on cord thickness: 3mm cord works beautifully for delicate, intricate patterns and feather projects. 4mm to 5mm cord is your workhorse — it is ideal for most beginner DIY macrame wall hangings because the knots are easy to see and handle. Anything above 5mm starts to feel bulky and can be difficult to manipulate without experience.
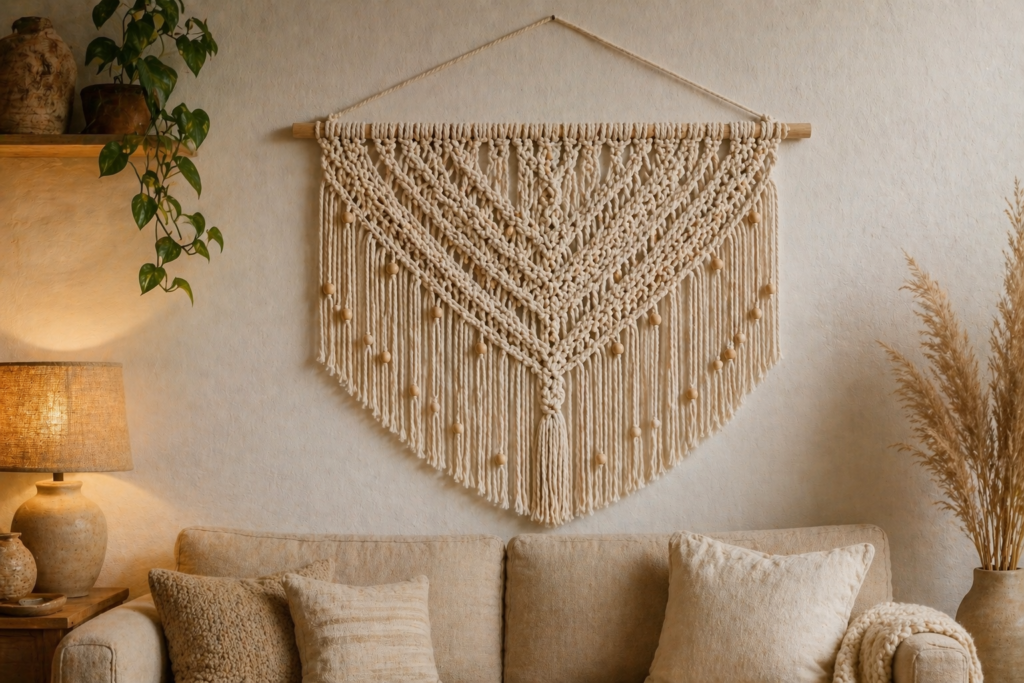
The Basic Square Knot Starter Piece
If there is one DIY macrame wall hanging that every single beginner should start with, it is the classic square knot piece. This design is the bread and butter of the entire macrame world, and it acts as the foundation for almost every other complex pattern you will encounter online or in books.
How the Square Knot Works
The square knot uses four strands of cord. You cross the left strand over the two middle strands and under the right strand, then bring the right strand under the middle cords and up through the loop on the left. That completes the first half. You then repeat the mirror image to lock the knot. Repeat this motion in rows across your dowel and you will quickly build a beautiful, grid-like textile surface that looks far more complex than it actually is.
Tips for a Perfect Square Knot Hanging
- Keep your tension even throughout the entire piece — pulling too tightly creates bumps and waves.
- Use a 4mm or 5mm three-strand twisted cotton cord for the clearest knot definition.
- Work at eye level so you can step back and check your symmetry frequently.
- Trim the fringe at the bottom in a straight horizontal line for a clean, modern finish, or angle it for a boho V-shape.
This project typically takes two to three hours for a 12-inch-wide beginner piece. The finished result has a clean, Scandinavian-meets-boho aesthetic that fits effortlessly into living rooms, bedrooms, and hallways alike. It is the perfect ‘I tested the waters and now I am obsessed’ project that will almost certainly lead to your next DIY macrame wall hanging the very same weekend.
The Rustic Natural Branch Hanging
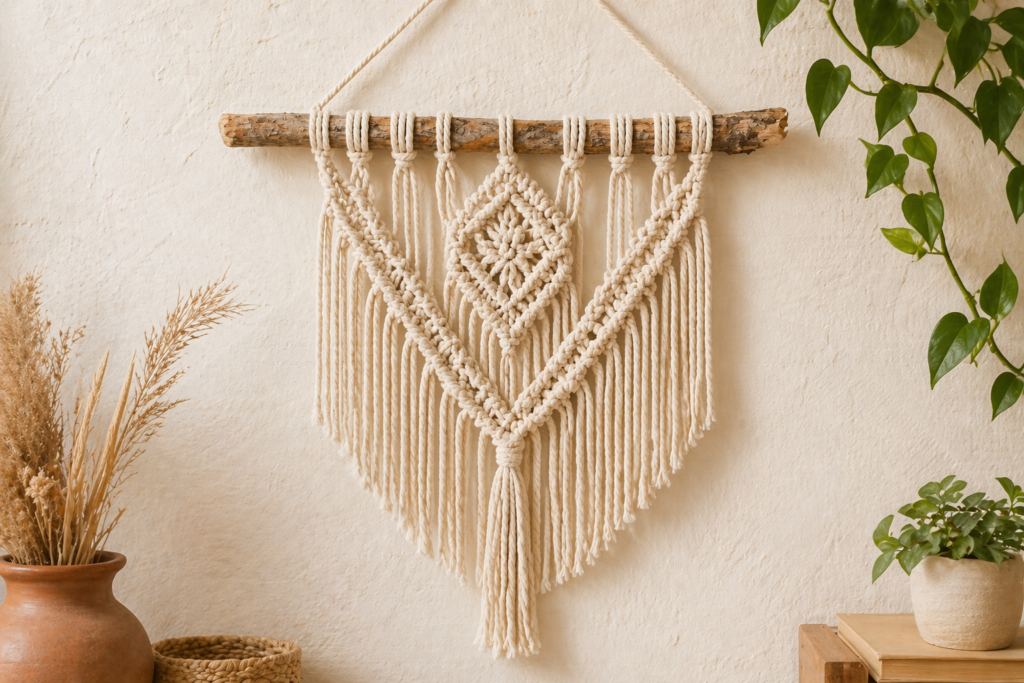
One of the most popular DIY macrame wall hangings on the internet right now is the natural branch design — and it is easy to understand why. Using a real piece of found wood as your anchor instead of a store-bought dowel immediately gives your artwork a one-of-a-kind, handcrafted quality. No two pieces of wood are exactly the same, which means no two wall hangings will ever be identical.
Finding and Preparing Your Branch
Head outside and look for a branch that is roughly straight, at least half an inch thick, and free of soft or rotting wood. Bring it inside and let it dry completely if it was recently fallen. Give it a light sand with medium-grit sandpaper to smooth any sharp edges that could snag your cord. For a polished look, rub a thin coat of beeswax or coconut oil into the wood to bring out its natural grain before you begin attaching cord.
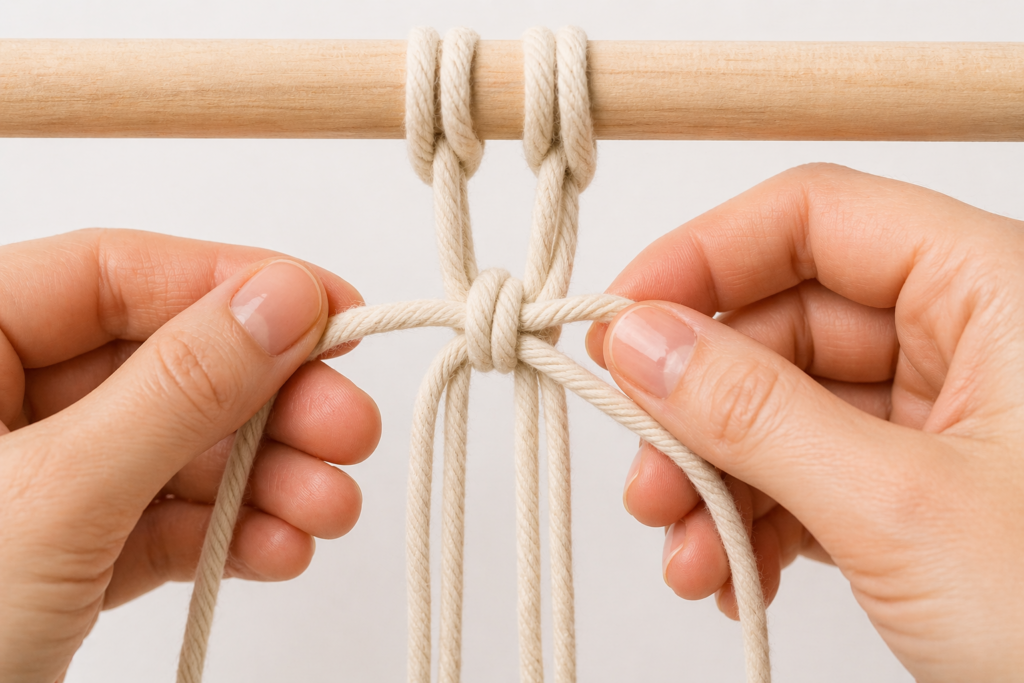
Attaching Cord with the Lark’s Head Knot
The lark’s head knot is the simplest knot in existence and the one you will use to attach every single strand to your branch. Fold a length of cord in half, lay the loop over the top of the branch, and pull both tails up through the loop. Pull snug. Space your lark’s head knots evenly along the branch — about half an inch apart — leaving an inch of bare wood showing on each end to frame the piece beautifully.
Idea 3: The Minimalist Brass Ring Geometric Piece
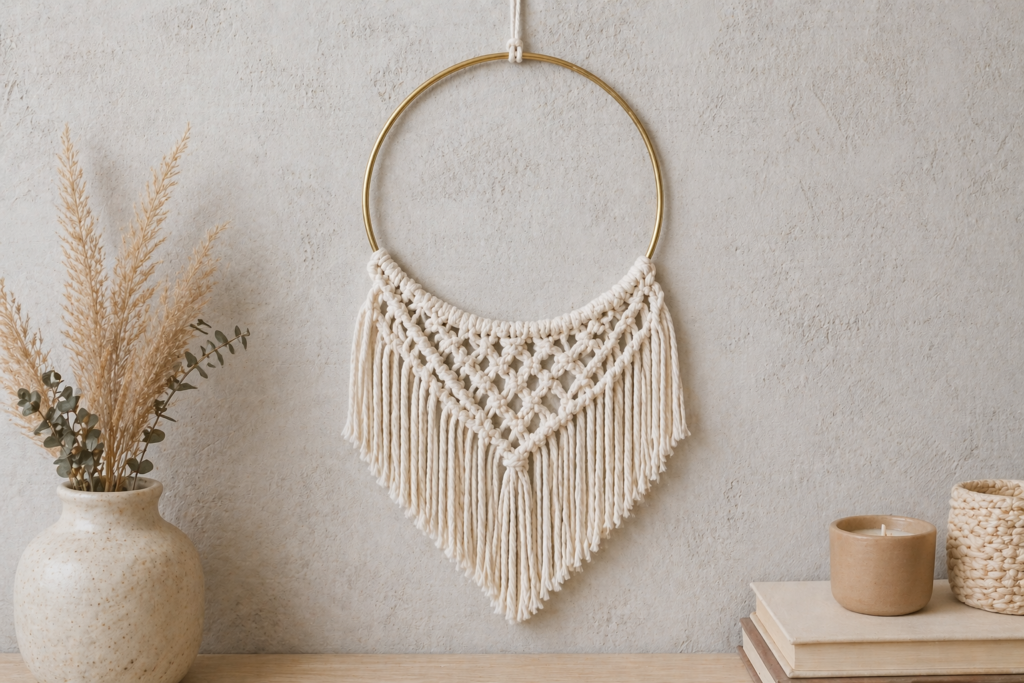
Not every DIY macrame wall hanging needs to be a large, fringe-heavy statement piece. The brass ring geometric design is the ‘less is more’ option — elegant, modern, and perfectly suited to small apartments, gallery walls, or any space where you want a hint of texture without overwhelming the room.
Choosing Your Hoop
Look for a brass or gold-toned metal hoop between 6 and 14 inches in diameter at any craft store or online. You only need to knot cord across a portion of the ring — roughly one-third to one-half — leaving the rest of the metal exposed. This negative space is what gives the piece its modern, architectural feel. The contrast between cold metal and warm, organic cotton cord is visually striking in a way that a fully covered hoop never quite achieves.
Creating the V-Shape Fringe
Once your knots are complete, cut the hanging cords at the bottom into a sharp ‘V’ shape. Use a piece of painter’s tape as a cutting guide to keep your angle perfectly symmetrical. A good pair of sharp fabric scissors is non-negotiable here — blunt scissors leave frayed, jagged edges that undermine the clean aesthetic of this design.
Idea 4: The Brushed-Out Macrame Feather Trio
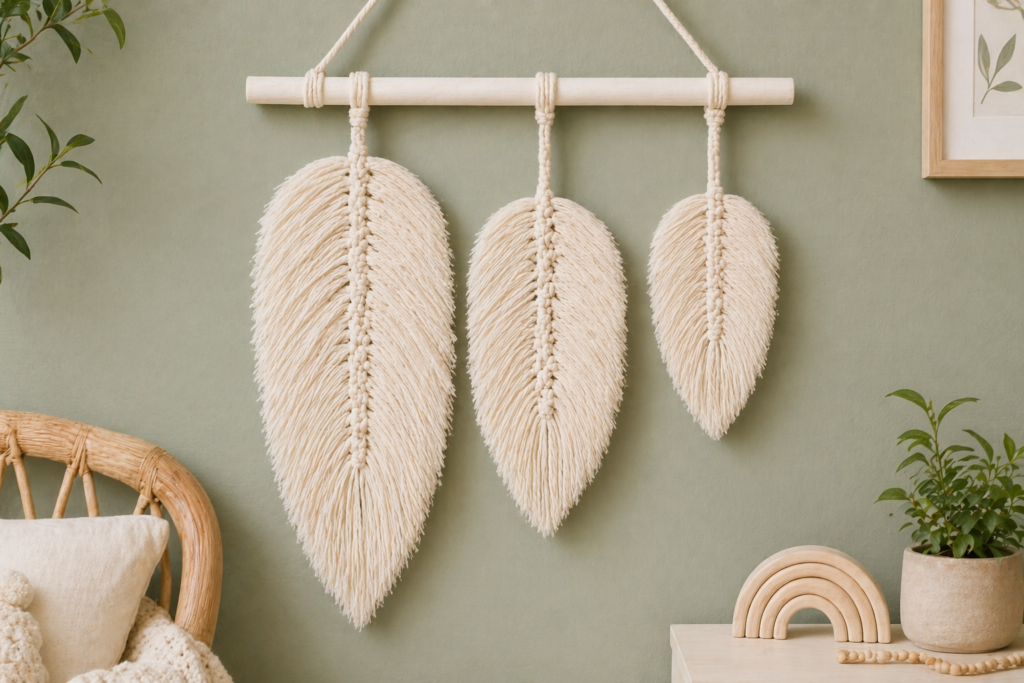
If you are looking for a DIY macrame wall hanging that feels soft, tactile, and almost whimsical, the macrame feather set is your answer. These gorgeous creations are made by tying short horizontal cords onto a central spine and then combing them out until they resemble real feathers or elongated leaves. Displayed as a trio in graduating sizes on a single dowel, they create a wall installation that feels like it belongs in a high-end home goods boutique.
Tying the Feather Body
Start with a long central cord for the spine and attach shorter horizontal pieces using simple overhand knots, packing them as tightly together as possible. It will look alarmingly messy at this stage — more like a hairy caterpillar than a feather — but do not panic. The transformation happens when you pick up your comb. Using a fine-tooth pet slicker brush, unravel every individual strand of the cotton cord until the feather is completely fluffy and soft.
Trimming to Shape
Once brushed out, use sharp scissors to trim the feather into a pointed leaf or classic feather silhouette. Work slowly and cut small amounts at a time. Finish with a light spray of extra-hold hairspray or diluted fabric stiffener to help the piece maintain its shape on the wall over time. A trio of three feathers in sizes small, medium, and large has an incredibly satisfying visual rhythm.
Idea 5: The Dip-Dyed Modern Fringe Hanging
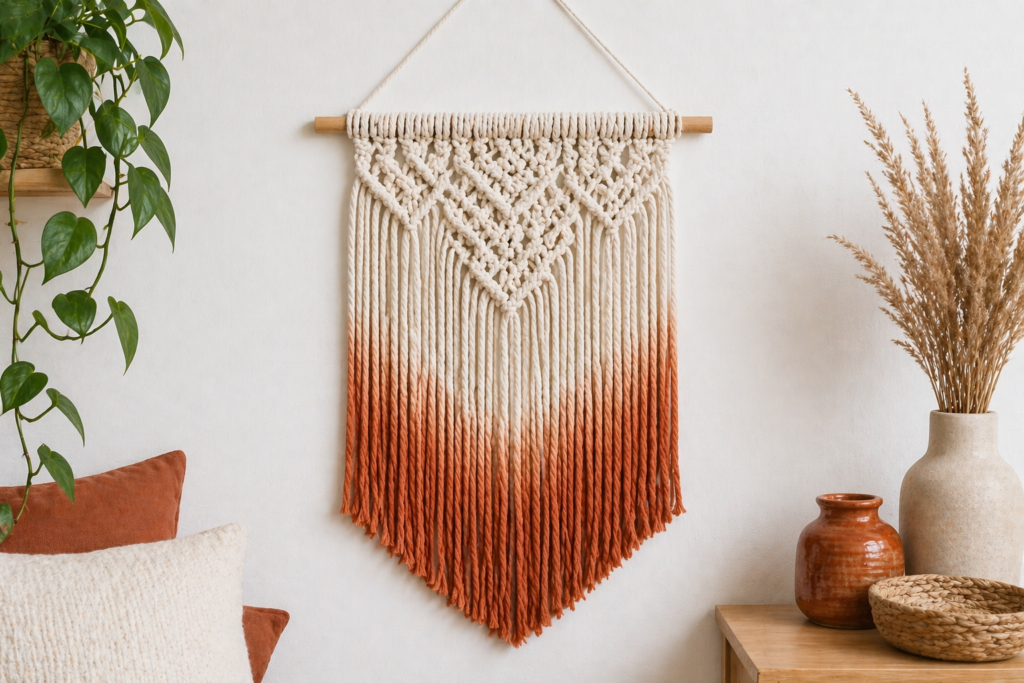
A plain white DIY macrame wall hanging is beautiful, but sometimes a room calls for a touch of color. The dip-dyed design solves this problem perfectly. You construct a simple fringe hanging first using basic square knots and spiral half-hitch knots, then dip the bottom portion into a bowl of fabric dye to create a gorgeous ombre gradient effect.
Choosing Your Color Palette
Deep navy, dusty rose, warm terracotta, and sage green are the four most popular dye choices for DIY macrame wall hangings right now. For a subtle, earthy look, try natural dyes made from turmeric (yellow-gold), avocado pits (blush pink), or red cabbage (soft lavender-blue). Make sure your cotton cord is completely saturated with water before dipping it into the dye bath — dry cord absorbs unevenly and creates splotchy, unpredictable results.
Dipping Technique
For a sharp color transition, dip just the bottom two inches of fringe and hold it submerged for five minutes. For a soft gradient, dip the bottom half and repeatedly lift and lower the piece over fifteen to twenty minutes, letting progressively less cord touch the dye each time. Hang the dyed piece over a shower rod or clothesline to drip-dry completely before combing out the fringe. The fibers may feel stiff after drying — a quick brush restores their natural softness.
Idea 6: The Mini Macrame Pocket for Dried Flowers
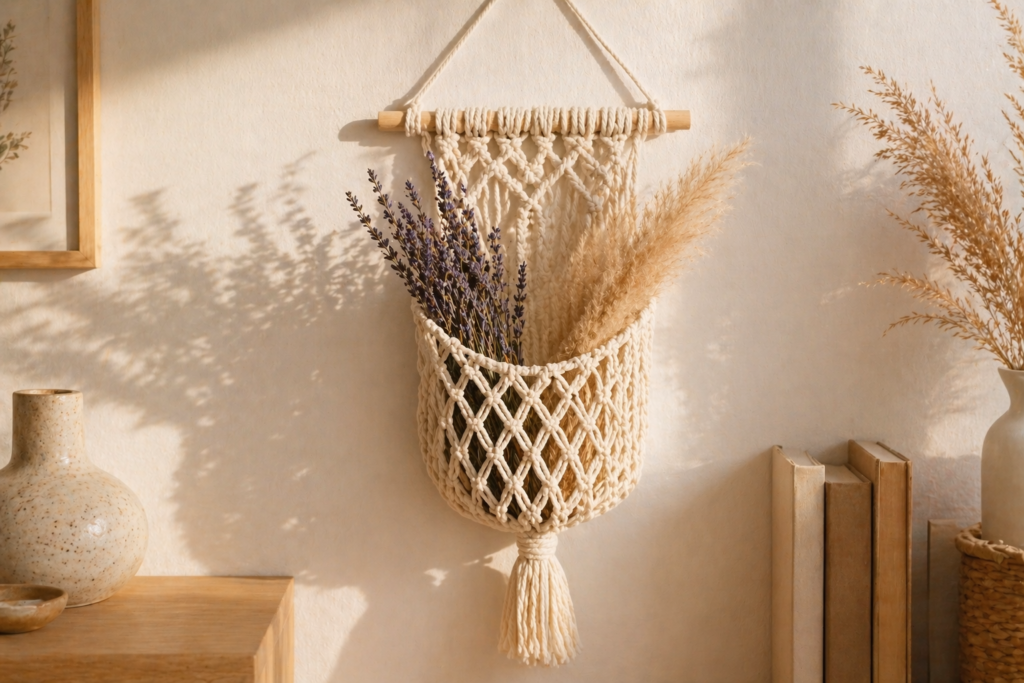
Who says a DIY macrame wall hanging has to be purely decorative? This clever mini pocket design is both a beautiful fiber art piece and a functional holder for dried botanicals, small crystals, or even a rolled-up piece of printed art. It is one of the most unique DIY macrame wall hanging ideas on this list and consistently one of the most popular gift ideas for friends with a boho aesthetic.
Building the Pocket Structure
You construct the pocket using alternating square knots to build a mesh-like net that gradually closes at the bottom to form a pouch. The key is to keep your knots tighter at the base of the pouch so that small stems do not slip through the gaps. You can customize the width and depth of the pocket easily — add more cords for a wider pocket, or increase the number of rows for more depth.
Styling with Dried Botanicals
The neutral cream tones of macrame cord are a perfect backdrop for the muted, dusty colors of dried flowers. Pampas grass, dried lavender bundles, baby’s breath, and preserved eucalyptus all look stunning tucked into a macrame pocket. Swap out the botanicals seasonally to keep your wall decor feeling fresh throughout the year. This hanging works especially well in bathrooms, narrow hallways, and reading nooks where wall space is limited.
Idea 7: The Large-Scale Beaded Statement Piece
If you have a large blank wall above a sofa, bed headboard, or fireplace that is making you anxious, a large-scale DIY macrame wall hanging with wooden beads is your solution. This is the most ambitious project on our list, but the visual payoff is extraordinary. A well-executed beaded macrame piece becomes the undisputed focal point of an entire room and makes the space feel curated, intentional, and high-end.
Incorporating Wooden Beads
Unfinished wooden beads with large holes (at least 8mm) are available at most craft stores for very little money. Thread them onto your cords as you work — either in scattered, organic placements or in neat horizontal rows for a more structured, architectural look. To thread thick cords through the beads more easily, wrap a small piece of masking tape tightly around the end of the cord to act as a makeshift needle. The natural wood tone against cream cotton is a classic combination, but gold-painted or black-dipped beads can give the piece a more dramatic, contemporary edge.
Working at Scale
For a piece three to four feet wide, always hang your dowel at eye level on a garment rack or a pair of command hooks rather than working flat on a table. Working flat on large projects leads to a sore back, uneven tension, and a design you cannot properly assess until it is too late. Step back every few rows to check your symmetry and ensure your beads are landing exactly where you want them to.
Idea 8: The Boho Sun / Mandala Hoop Design
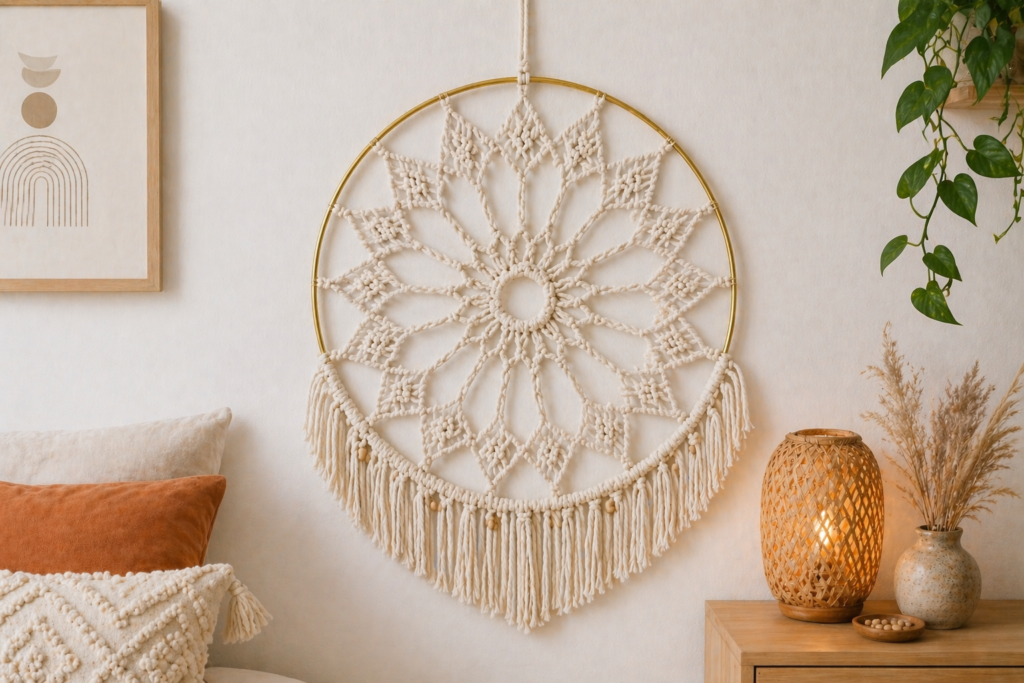
The sun or mandala hoop design is one of the most visually striking DIY macrame wall hangings you can make, and it is surprisingly achievable for beginners who have mastered the basics. This piece uses a large metal hoop — typically 12 to 18 inches — as the frame, with cords radiating outward from the center like sun rays or arranged in concentric circles to create a mandala effect.
Setting Up the Radial Pattern
Start by stretching a series of cords across the full diameter of the hoop in multiple directions, crossing them in the center. These become the warp threads onto which you weave or tie your knots. You can use a simple wrapping technique to cover the initial crossings in the center, then work your way outward, tying gathering knots and wrapping individual spokes to build the geometric pattern. Finish the outer edge with a row of short fringe lengths cut uniformly around the bottom half of the hoop.
Idea 9: The Twisted Spiral Half-Hitch Column Hanging
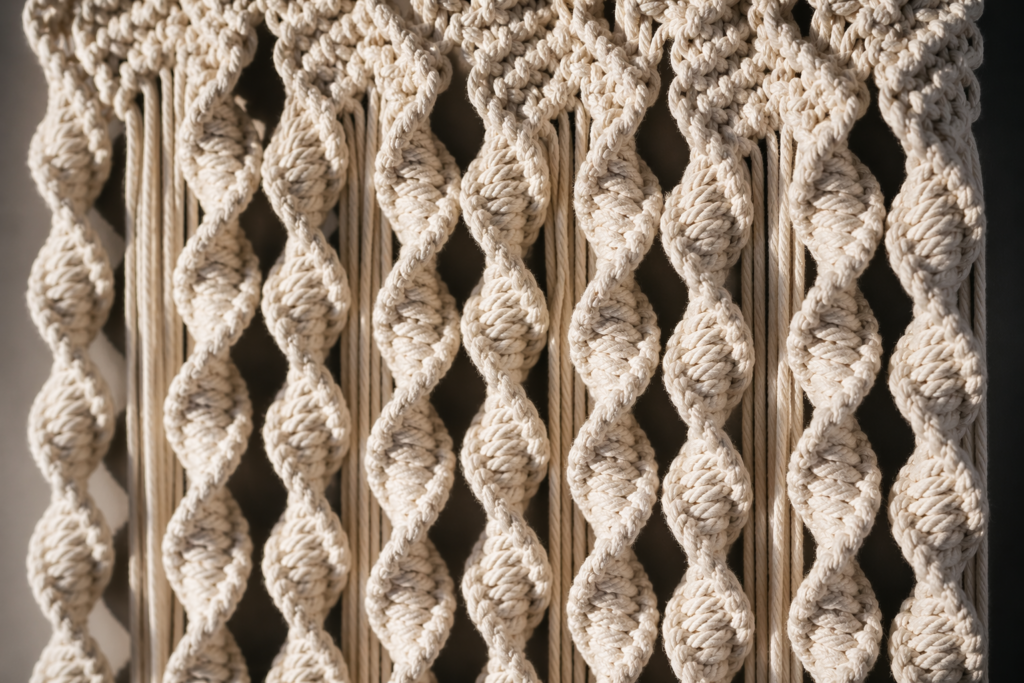
The spiral half-hitch knot creates one of the most hypnotic textures in all of DIY macrame wall hangings. Unlike the flat square knot, the half-hitch tied consistently on the same side causes the cord to twist naturally in a helical spiral, creating a design that looks like a carefully engineered architectural column. A wall hanging made entirely from these spiraling columns has a sculptural, three-dimensional quality that photographs beautifully and looks even better in person.
Mastering the Half-Hitch Spiral
Using two working cords around two central filler cords, tie your half-hitch knots consistently on the left side only, tightening each one with a gentle firm tug. After about six to eight knots, the column will begin rotating naturally. Do not fight it — let it turn. Continue tying on the same side, and the spiral will complete itself with no extra effort required. A wall hanging with five or six of these spiraling columns side by side, finished with a long uniform fringe at the bottom, is absolutely mesmerizing.
Idea 10: The Cascading Waterfall Statement Hanging
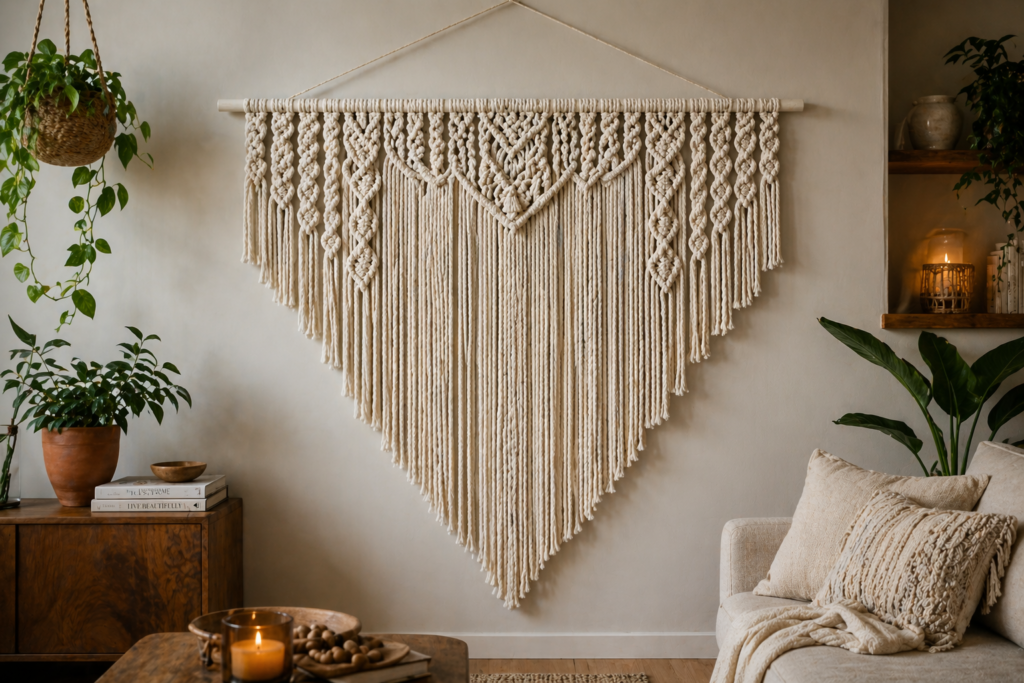
The cascading waterfall design is the most dramatic DIY macrame wall hanging on our entire list. The concept involves attaching cords of deliberately varied lengths to a wide dowel, creating a piece where the center cords hang significantly longer than the outer cords, forming a graceful curved silhouette reminiscent of a waterfall or a crescent moon. This technique creates incredible visual depth and movement, and the piece looks genuinely different at every angle and in every light.
Planning the Length Gradation
Before cutting your cords, map out the gradation on paper. A typical waterfall hanging on a 24-inch dowel might have outer cords finishing at 12 inches from the dowel and center cords extending 36 inches, with smooth gradations in between. Cut your cords at four times the desired finished length to account for the shortening effect of knotting. Use a combination of square knots at the top for structure and long fringe at the bottom to maximize the flowing effect.
Pro Tips for Perfect DIY Macrame Wall Hangings
Measure twice, cut once: Always cut your cords at four times the desired finished length for knotted sections and two times for fringe-only sections. Running out of cord mid-project is the single most frustrating beginner mistake.
Use a garment rack: Working at eye level on a hanging rack is infinitely better than working flat on a table for any project wider than 12 inches. Your back will thank you and your symmetry will dramatically improve.
Steam-straighten your cord: If your cotton cord arrives kinked from the spool, run a clothes steamer or a damp cloth over it to relax the fibers before you start knotting. Kinked cord creates uneven knots.
The comb is your best friend: A pet slicker brush or a fine-tooth comb is essential for creating that beautiful, fluffy fringe effect. No other tool achieves the same result.
Embrace imperfection: The beauty of handmade DIY macrame wall hangings is their organic imperfection. Slight variations in tension and spacing are what make your piece uniquely yours — not manufacturing defects.
Hang your finished piece immediately: Cotton cord relaxes and straightens under its own weight over time. Hang your finished macrame piece right away and allow gravity to do its final styling work over 24 to 48 hours.
Where to Buy Macrame Supplies (External Resources)
Sourcing quality materials is crucial for great DIY macrame wall hangings. Here are some trusted external resources to explore:
Etsy (etsy.com): The best marketplace for handspun cotton cord in unique colors and natural macrame supplies from independent sellers worldwide.
JOANN Fabrics (joann.com): A reliable US-based craft chain carrying a solid range of cotton macrame cord, wooden dowels, and wooden beads at accessible prices.
Amazon Handmade (amazon.com/handmade): A convenient source for bulk cotton cord, metal hoops in multiple sizes, and starter macrame kits ideal for beginners.
The Spruce Crafts (thesprucecrafts.com): An excellent online resource for free macrame patterns, video tutorials, and in-depth knot guides for beginners and intermediate crafters.
Macrame School (macrameschool.com): A dedicated online platform with free and premium video courses teaching everything from basic knots to large-scale DIY macrame wall hangings.
Frequently Asked Questions About DIY Macrame Wall Hangings
What cord is best for DIY macrame wall hangings?
A 4mm or 5mm three-strand twisted cotton cord is ideal for beginners. It grips well, shows knot definition clearly, and is comfortable on your hands during long knotting sessions. Avoid synthetic or polyester cords as they are slippery and difficult to control.
How long does it take to make a macrame wall hanging?
A small beginner piece (12 inches wide, 24 inches long) typically takes two to four hours. A large statement piece can take eight to fifteen hours spread across multiple sessions. Most beginners find that speed improves dramatically after their first two or three projects.
How do I hang my finished macrame wall hanging?
For pieces on a wooden dowel, simply thread a length of matching cord through the dowel and tie it in a loop. Hang from a single nail or hook. For hoop designs, attach a hanging cord to the top of the metal ring. Most macrame pieces are quite lightweight and will hang comfortably from a standard picture hook.
Can I wash my macrame wall hanging?
Yes. Gently hand-wash in cold water with a small amount of mild detergent, rinse thoroughly, and hang to dry. Avoid machine washing as the agitation can tangle and distort the knots permanently.
How do I stop my macrame fringe from fraying?
For a clean, sealed edge, you have two options: use a small amount of clear fabric glue on the very tip of each cut cord, or run a lighter flame extremely quickly past the end (this works better on synthetic cord than cotton). For cotton cord, a tiny dab of clear craft glue is the safest option.
Is macrame hard to learn?
Macrame is genuinely beginner-friendly. The two core knots — the square knot and the half-hitch — can be learned in under an hour. Most DIY macrame wall hangings for beginners use only these two knots in various combinations. The learning curve is relatively gentle compared to most fiber arts.
Final Thoughts: Start Your DIY Macrame Wall Hanging Journey Today
DIY macrame wall hangings are proof that you do not need a big budget or advanced artistic skills to transform your home. With nothing more than a spool of cotton cord and a few hours of your time, you can create pieces that rival anything you would find in a boutique interior design shop — and they will carry the incomparable satisfaction of being entirely handmade by you.
Whether you start with the simple square knot piece, dive straight into a dip-dyed ombre design, or challenge yourself with the large-scale beaded statement hanging, every single project on this list is achievable for a complete beginner. The secret is simply to start. Order that cord, find a stick in your garden, and tie your first lark’s head knot. Your blank walls are waiting for some texture, and your hands will thank you for the creative outlet.
Remember: if you make a mistake in macrame, you can always untie it and start over. No wasted materials, no permanent damage, no problem. It is the most forgiving craft in the world, and that is exactly why DIY macrame wall hangings have captured the hearts of crafters and interior design enthusiasts all over the world.