1. The Night I Ripped Off My Gel Nails (And Instantly Regretted It)

Let me set the scene. It was a Sunday evening, three weeks into a gel manicure that had started chipping at the edges. My nails looked rough. I had a Monday morning meeting. I had zero patience.
So I did what absolutely everyone does at least once: I grabbed the edge of the lifting gel and peeled. Hard. In about forty seconds I’d removed all ten nails.
What I was left with was horrifying. My natural nails looked like they’d been through a paper shredder — thin, white, bendy, and weirdly painful to touch for the next two weeks. I’d basically peeled off the top layers of my actual nail along with the gel.
I wish someone had sat me down before that moment and shown me how to remove gel nail polish properly. Not the watered-down version you find on the back of a bottle — the real, honest breakdown of every method, what each one actually feels like, which one to pick depending on your situation, and what to do when things go sideways.
That’s what this is. Every word comes from me actually doing this, messing it up, and figuring out what works.
2. Why Gel Polish Is So Hard to Remove (Quick But Important Background)
Before we get into the methods, it genuinely helps to understand why gel polish is the way it is — because once you get this, all the removal techniques make complete sense.
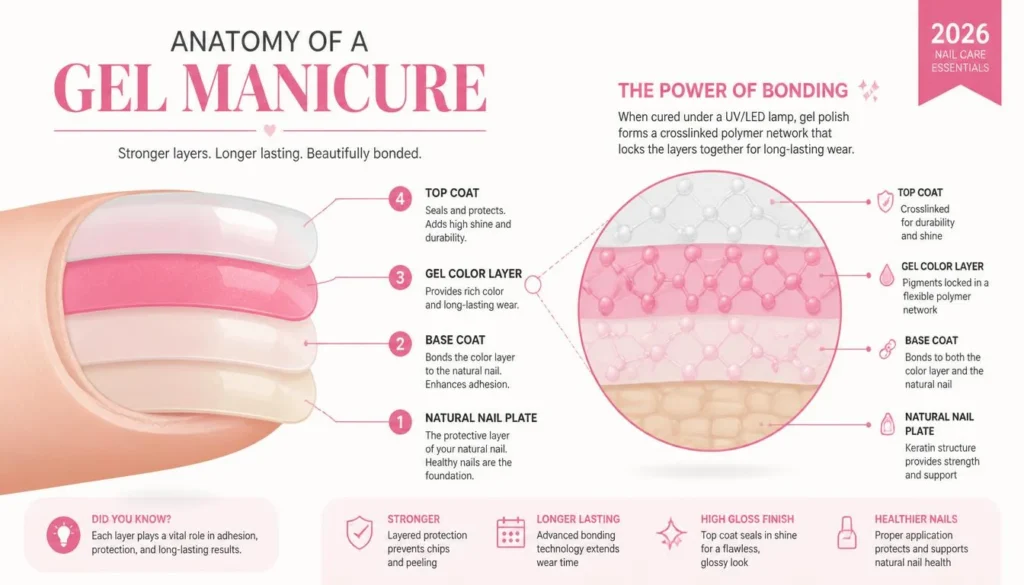
Regular nail polish sits on top of your nail and peels off with a simple solvent. Gel polish is different. It goes on in layers and gets cured (hardened) under a UV or LED lamp at each stage. That curing process creates a cross-linked polymer structure — basically, the molecules bond together and to your nail surface in a way that’s not going to come off with a swipe of regular remover.
That’s what makes gel so shiny, chip-resistant, and long-lasting. It’s also exactly what makes removal feel like a project.
The key thing to know: only one thing reliably breaks down that bond without mechanical force — acetone. Everything else (filing, peeling, electric drills) either removes the material physically or uses acetone in a different delivery method. Once you know this, the whole “which method is best” question becomes a lot easier to answer.
3. What You Actually Need (No Fancy Gadgets Required)
I’ve tried this with a full professional kit and with whatever I had in the house at 11pm. Here’s the honest list of what makes a real difference versus what’s just nice to have.
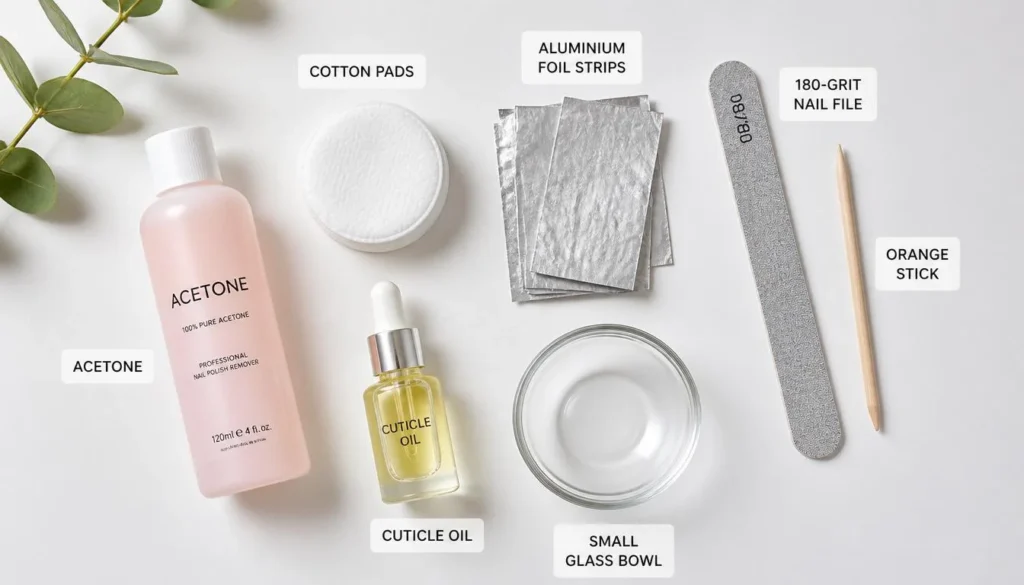
The Essentials:
- 100% pure acetone — NOT nail polish remover, not acetone-based, 100% pure. The big difference is speed and effectiveness. Regular remover takes forever and leaves a sticky residue. I use the kind sold for cleaning brushes or in beauty supply stores.
- Cotton balls or cotton pads — round pads work better than balls because they stay flat against the nail.
- Aluminium foil — cut into strips about 3 inches wide.
- A coarse nail file (180 grit) — for buffing the shiny top coat layer before soaking. This step alone cuts your soak time in half.
- An orange stick or cuticle pusher — for gently sliding off the softened gel after soaking.
- Cuticle oil — apply this after every gel removal, non-negotiable.
Nice-to-Have (But Not Necessary):
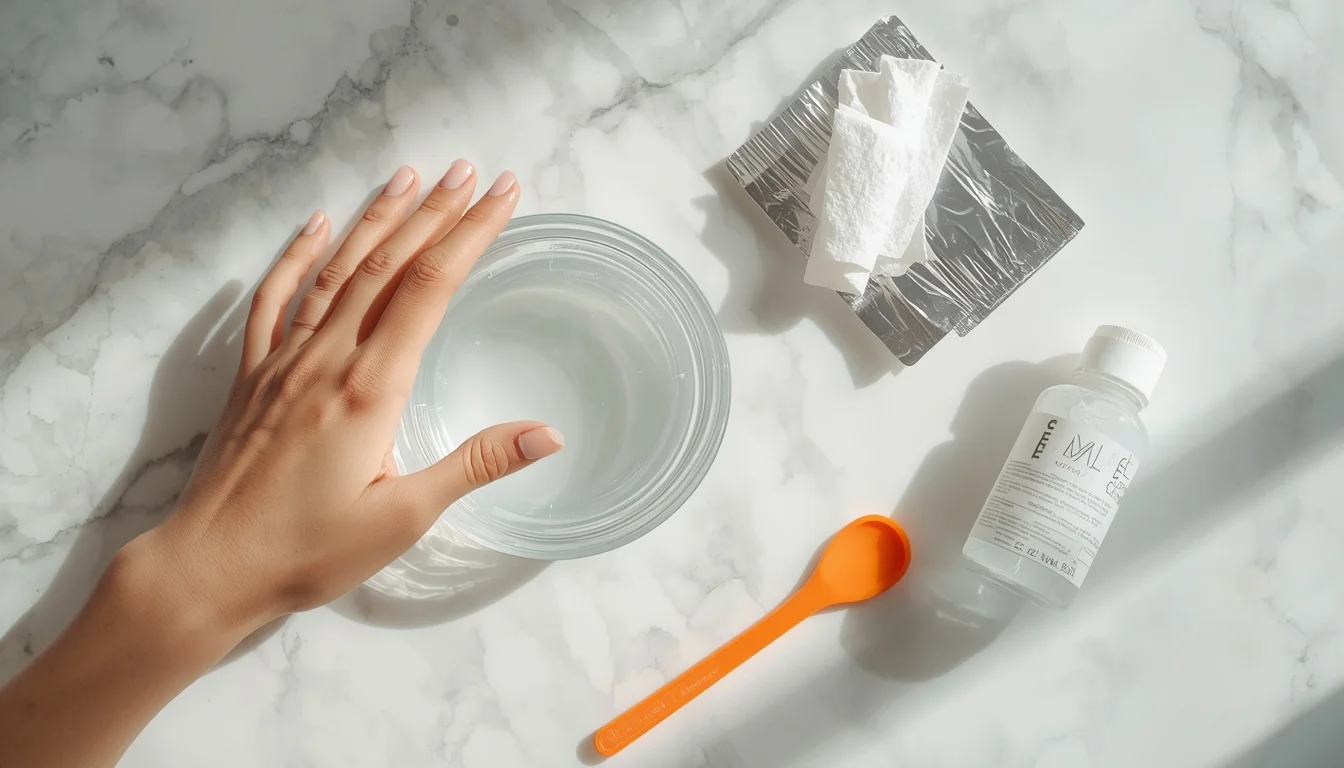
- A small glass bowl for bowl soaking (if you prefer that method).
- A nail buffer block to smooth the surface after removal.
- Hand cream — acetone is drying, and your skin around the nails will feel it.
- Rubber gloves for the hand doing the soaking (so only the nails being removed are exposed to acetone).
Total cost for everything? Around $10–15 if you’re starting from zero. I’ve seen “gel removal kits” on Amazon for $20–30 that basically contain these same items with a logo on the box.
4. The Classic Foil Method: Step-By-Step (This Is the One That Works)
This is the method I default to every single time now. It takes about 25–35 minutes total and leaves my nails in genuinely good condition. Here’s exactly what I do.
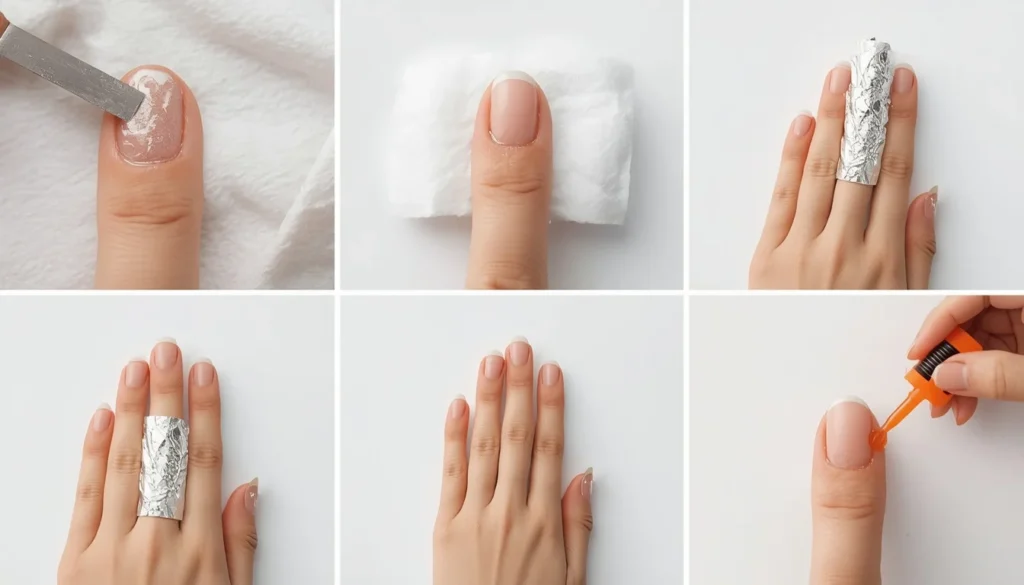
Step 1 — File the shine off the top coat
Take your 180-grit file and lightly buff the surface of each nail until the glossy top coat is completely gone and the nail looks matte. You’re not trying to file off the gel itself — just break the seal on the surface so acetone can get underneath. This single step cuts your soak time from 20 minutes down to around 10–12.
Step 2 — Cut your foil and soak your cotton
Cut your foil into 10 rectangles, roughly 4 inches by 3 inches. Saturate a cotton pad or a small piece of cotton ball with pure acetone and place it directly on top of one nail. Then wrap the foil tightly around the fingertip to hold the cotton in place. Repeat for all ten nails.
Step 3 — Wait 10–15 minutes
This is the part people rush. Set a timer. Go watch something. The acetone needs time to do its job. If you filed properly, 10–12 minutes is usually enough. If you skipped filing, give it 18–20 minutes.
Step 4 — Slide off the gel
Remove the foil from one nail, keeping the cotton pressed against it. Then, using the cotton itself or an orange stick, gently push or slide the softened gel toward the tip of the nail. Most of it should come off in one sheet. If it resists, rewrap for another 3–5 minutes — never force it.
Step 5 — Clean up residue
There will be a little gel residue left in spots. A quick, gentle buff with a 240-grit buffer or the fine side of a nail block is all you need. Do not file hard at this point — you’ve already exposed the natural nail and you don’t want to thin it.
Step 6 — Apply cuticle oil immediately
Acetone strips moisture aggressively. The moment all the gel is off, apply cuticle oil to every nail and let it soak in. Follow with hand cream. Your nails will look a little white and dry for a few hours — this is normal and temporary.
5. All 7 Methods Compared — Which One Is Right For You?

I’ve tried all of these personally, or watched a professional use them on me. Here’s the honest comparison with no sugarcoating.
| # | Method | Time Needed | Skill Level | Nail Damage Risk | Best For | Cost |
| 1 | Foil + Acetone Soak | 25–35 min | Beginner | Low (if done right) | Home removal, all gel types | $2–5 per use |
| 2 | Bowl Soak in Acetone | 20–30 min | Beginner | Low–Medium | When you don’t have foil | $2–4 per use |
| 3 | File + Peel (peelable gel only) | 10–15 min | Beginner | Zero (peelable gel) | Peelable/peel-off gel only | $0 |
| 4 | Electric Nail Drill | 15–20 min | Advanced | Medium–High if wrong bit | Thick builder gel, acrylics | $30–$80 one-time |
| 5 | Gel Remover Clips/Clamps | 25–30 min | Beginner | Low | Alternative to DIY foil | $5–15 one-time |
| 6 | Non-Acetone Methods | 40–60 min | Beginner | Low (but slow) | Acetone-sensitive skin | $3–8 per use |
| 7 | Professional Salon Removal | 20–30 min | None needed | Very low (pro hands) | First-timers, thick gel | $10–20 per visit |
Method 1 — Foil + Acetone (Winner for Most People)
This is what I described in the step-by-step above. The foil keeps the cotton pressed firmly to the nail, creates a warm micro-environment, and speeds up the acetone penetration. It’s messy to set up but genuinely the most reliable DIY method.
Method 2 — Bowl Soak
You fill a small bowl with acetone and rest your fingertips in it. Simpler to set up, but you’re exposing all the skin around your nails to acetone for the entire duration. Your skin will look pruned and feel tight afterward. I use this if I’ve run out of foil, but I prefer the foil method.
Method 3 — File and Peel (Peelable Gel Only)
Some gel polishes are specifically formulated to peel off cleanly. Brands like ZOYA and some indie nail companies sell peel-off base coats that you apply under regular gel. If you used one of those, you can just lift an edge and peel the whole thing off in one piece with zero damage. If you didn’t — do not attempt this.
Method 4 — Electric Nail Drill
Nail techs use electric drills with a carbide or ceramic bit to file off most of the gel before doing a quick acetone soak for the remaining thin layer. In professional hands, it’s fast and precise. I tried a cheap electric drill kit at home and immediately filed too deep on my pinky. I don’t recommend this for home use with thick gel.
Method 5 — Gel Remover Clips
These are plastic spring clips with a built-in pad. You soak the pad in acetone, clip them onto each finger, and wait. They work pretty well and are more comfortable than foil. Decent investment if you remove gel regularly.
Method 6 — Non-Acetone Methods
Isopropyl alcohol, white vinegar, and warm soapy water are sometimes suggested as acetone alternatives. Honestly? None of them work as well for standard gel polish. They can help soften the edges slightly, which makes peeling less damaging, but they don’t fully dissolve the gel bond. If you have skin that reacts badly to acetone, talk to a dermatologist before removing gel at home — this isn’t a problem acetone-free products can fully solve.
Method 7 — Professional Salon Removal
Your nail tech has better tools, better lighting, and experience with different gel formulas. If you’re nervous, it’s your first removal, or you have thick builder gel or extensions, paying $10–20 for professional removal is genuinely worth it to avoid months of nail recovery.
6. The 2026 Gel Removal Trends You Should Know About
The nail industry has changed noticeably in the past year or so, and a few of these shifts actually affect how you remove gel at home.
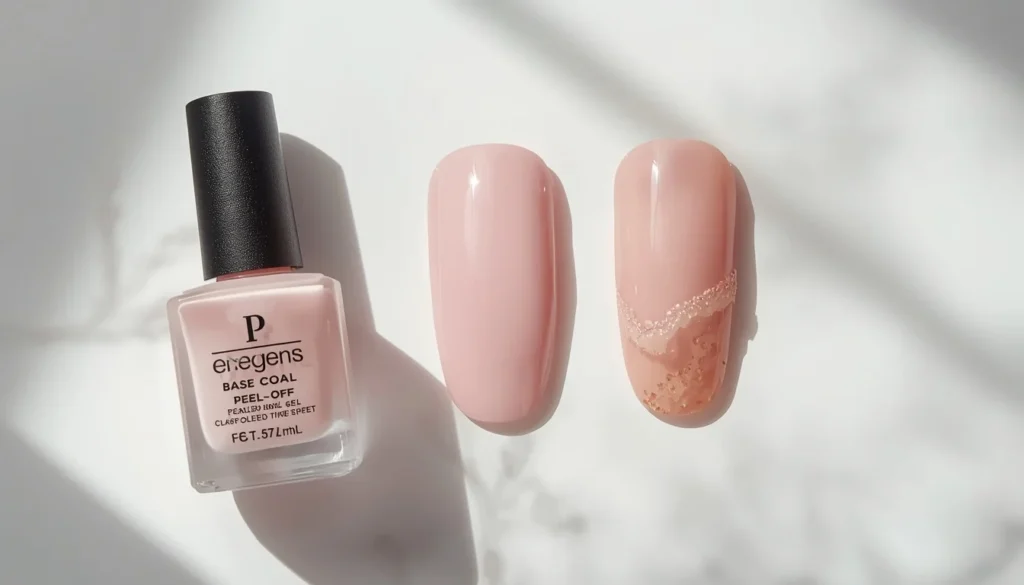
Trend 1 — Peel-Off Base Coats Are Mainstream Now
More brands are selling peel-off base coats designed to go under regular gel. You apply the peel-off base, cure it, then apply your gel on top as normal. When you want to remove it three weeks later, you lift one edge and the whole gel lifts cleanly. The peel-off base coat absorbs the bond. It genuinely works, and removal goes from a 30-minute project to a 60-second one. Longevity is slightly reduced (expect 2–2.5 weeks instead of 3), but the tradeoff is worth it for frequent changers.
Trend 2 — ‘Soft Gel’ Extensions Replaced Hard Acrylics for Many Users
Soft gel tips (pre-shaped nail extensions that bond with gel rather than acrylic monomer) have become really popular. They require slightly different removal — usually still acetone soak, but longer (25–30 minutes after heavy filing) because the extension material is thicker. If you have these, add extra time and be patient.
Trend 3 — At-Home Electric Drills (Use With Caution)
Cheap e-file kits are everywhere on shopping platforms in 2026. They’re tempting because they cut removal time dramatically. The risk is real: one wrong angle or too much pressure and you’ve filed into the natural nail. If you’re determined to use one, watch at least three professional tutorials and start at the absolute lowest speed setting.
Trend 4 — Nail Health Content Is Pushing Back on Overuse
Dermatologists and nail technicians have started being more vocal about cumulative damage from back-to-back gel manicures with no break. The current advice circulating in 2026 nail communities is to take at least one week off between gel applications — ideally using that break to moisturise, strengthen, and let your nail plate recover.
7. The Biggest Mistakes People Make (I Made Most of These)
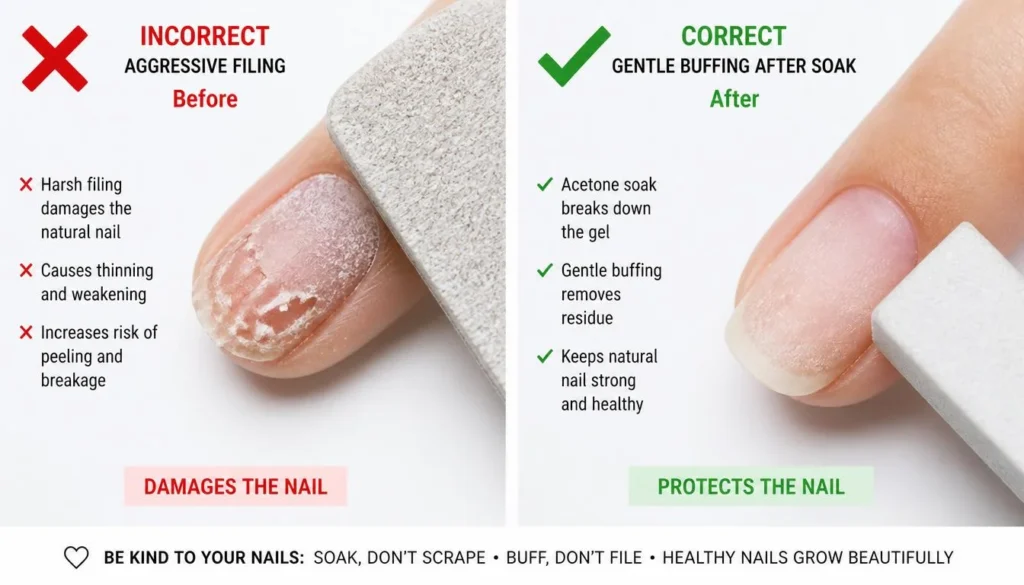
Peeling or ripping the gel off: Already told you about this in the intro. Peeling removes the top layers of your natural nail along with the gel. The damage can take 4–6 months to fully grow out. Just don’t.
Skipping the top-coat filing step: People skip this to save time and then wonder why they’re still sitting there 30 minutes in with gel that won’t budge. File the shine off first. It makes everything faster.
Using acetone-based remover instead of 100% acetone: This is a big one. Many “acetone” products are only 60–70% acetone mixed with water and conditioners. They work for regular polish but are too weak for gel. Get the pure stuff.
Not wrapping the foil tight enough: If acetone-soaked cotton isn’t pressed firmly against the nail, air gaps form and the acetone evaporates instead of soaking in. Wrap snugly.
Filing too aggressively after soaking: Once the gel is off, the nail is already thinner than normal. Buffing hard at this point is how you get that painful “heat from filing” sensation. Light passes only.
Skipping aftercare: Acetone strips your nails and the surrounding skin of every bit of natural moisture. If you don’t put cuticle oil on immediately after, you’ll have splitting, peeling cuticles and brittle nails for the next week.
Removing gel too early (before it’s started lifting): Gel that’s still firmly bonded takes much longer to remove and requires more filing and soaking, which means more exposure to acetone. Wait until you see some natural lifting at the edge before starting removal.
8. Removing Gel On Different Nail Types — What Changes

Not all gel manicures are the same, and the removal approach should shift slightly depending on what you have.
Standard gel polish on natural nails
This is the easiest scenario. Filing + foil method, 10–15 minutes. Described in full in Section 4.
Gel with a gel-x or soft gel tip extension
The extension adds thickness. File more aggressively (you can take off quite a bit of the tip material before hitting the natural nail — the extension is the buffer), then soak for 20–25 minutes instead of 10–15.
Builder gel (BIAB or hard gel)
Builder-in-a-bottle and hard gel products bond differently and are denser. They need a longer soak (25–30 minutes) after thorough filing. If it’s not coming off, file more — you’re probably not through the surface layer yet.
Gel over short, thin, or damaged nails
Go slower and gentler. Use the foil method, not the bowl, so you can control each nail individually. After removal, apply a strengthening base coat (like OPI Nail Envy or Essie Treat Love Color base) before doing anything else to the nail.
9. What To Do With Your Nails After Removal

This part gets skipped constantly and it’s the reason people end up with “gel-damaged nails” that are actually just dehydration damage. The removal itself isn’t the problem most of the time — the lack of aftercare is.
- Apply cuticle oil immediately. Jojoba-based oils absorb fastest. Massage into the nail plate and cuticles for 30 seconds per hand.
- Follow with a thick hand cream. Something with shea butter or urea to draw moisture back into the skin.
- If your nails feel flimsy or bendy, apply a nail strengthener. OPI Nail Envy, Essie Millionails, or any keratin-based hardener works. Leave a full week before reapplying gel.
- Give your nails a break. At minimum three to five days. Ideally a full week. Let them breathe, keep them filed to a practical length to reduce breakage risk.
- Stay hydrated and eat enough protein. This sounds unrelated but nail recovery genuinely speeds up with nutrition. Nails are made of keratin, a protein — your body needs the building blocks to rebuild.
One thing I noticed: the nails that recovered fastest weren’t the ones I treated with the most products. They were the ones I left alone the most. A bit of cuticle oil, no polish for a week, done.
10. Quick Answers to the Questions Everyone Searches
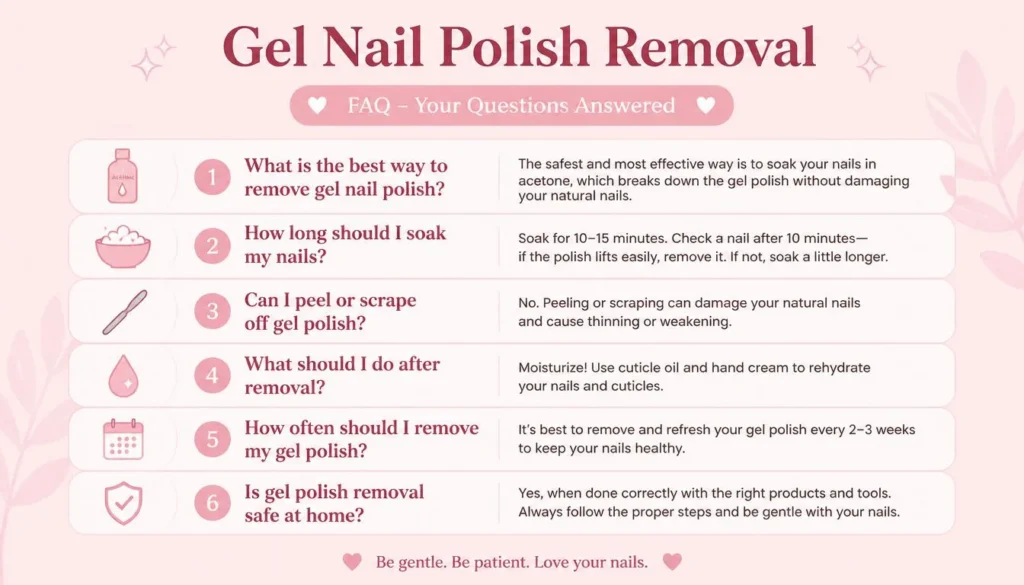
How to remove gel nail polish without acetone?
You can soften gel edges with warm soapy water or isopropyl alcohol, making careful peeling slightly less damaging — but this doesn’t fully dissolve gel. If you’re acetone-sensitive, a professional removal using a drill (which removes most gel mechanically) is a better option than trying non-acetone at home.
How long does it take to remove gel nail polish?
With the foil method and proper filing first: 25–35 minutes total. Without filing first: 40–50 minutes. Bowl soak: similar time but more uncomfortable. Professional removal: around 20–25 minutes.
Does removing gel nail polish damage your nails?
Done correctly, not significantly. The damage people associate with gel comes from peeling, aggressive filing, or back-to-back gel with no recovery break — not from acetone soak removal itself.
Can I remove gel nail polish with regular nail polish remover?
Technically yes, but it takes much longer (sometimes 45+ minutes of soaking) and the weaker acetone concentration means more skin exposure for less efficiency. Use 100% pure acetone for gel removal.
How to remove gel nail polish at home without damage?
File the top coat surface, wrap with acetone-soaked cotton and foil, wait 10–15 minutes, slide off gently with an orange stick, apply cuticle oil immediately. Never peel, never force it.
What is the best product to remove gel nail polish?
100% pure acetone is genuinely the best and also the cheapest. You don’t need a branded ‘gel remover’ product — they’re mostly just acetone in a different bottle.
11. Final Thoughts
Knowing how to remove gel nail polish properly is genuinely one of those small skills that makes a huge quality-of-life difference if you wear gel regularly. The whole process looks intimidating at first — all that foil and waiting and “don’t file too hard” warnings — but once you’ve done it two or three times, it’s completely routine.
The thing I’d go back and tell myself before that Sunday evening disaster: the only step that actually takes time is the soaking. Everything else is 60 seconds of work per nail. Rushing the soak is where everything goes wrong.
File. Wrap. Wait. Slide. Oil. That’s it. Your nails will thank you.
You May Also Like These Posts
- Wedding Nail Ideas
- Black Nail Ideas
- Trendy & Cute Vacation Nail Ideas 2026
- Pink Nail Ideas
- White French Tip Nails Ideas